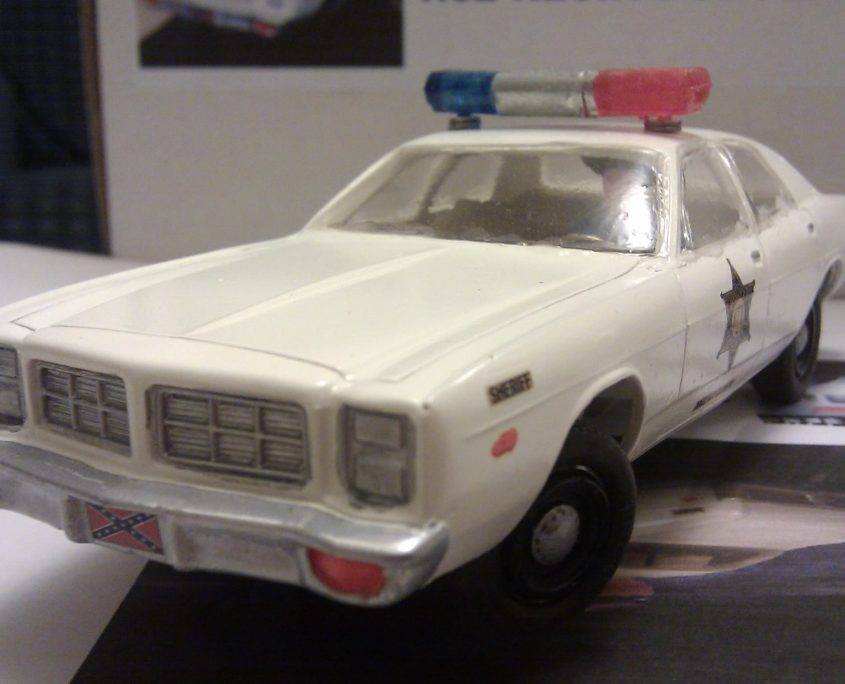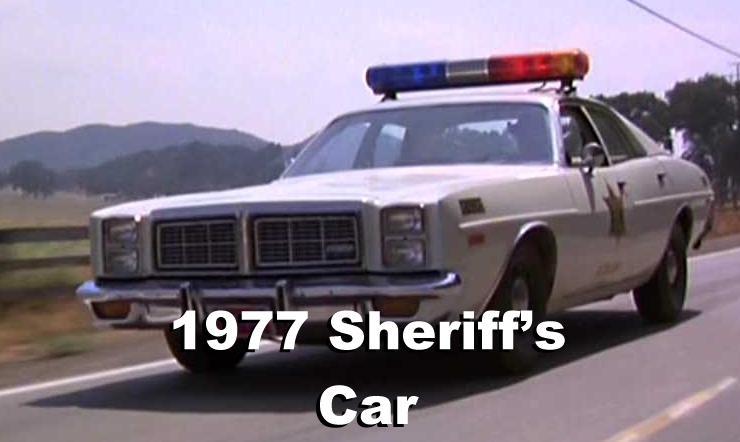
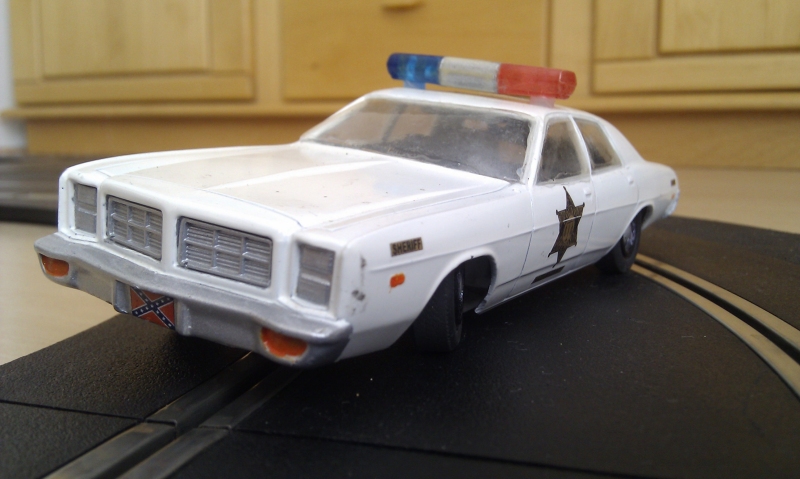
The choice for my first bodyshell was obvious to me, the American police car from TV shows I watched as a kid in the late ’70s and early ’80s. Every episode there was one like this being driven hard through the streets, usually chasing the hero and ending up crashed. Was it just me who saw the chase and looked for a roll bar inside? A sure sign the car wouldn’t make it more than a few minutes.
It’s said that in the Dukes of Hazzard, they went through over 300 Dodge Chargers when filming all the series, I wonder how many police cars were destroyed?
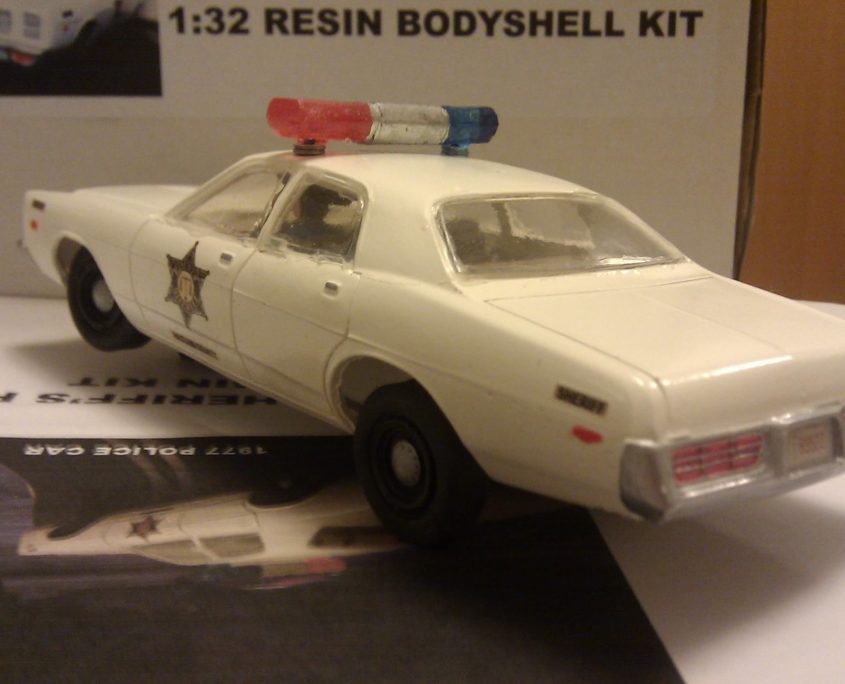
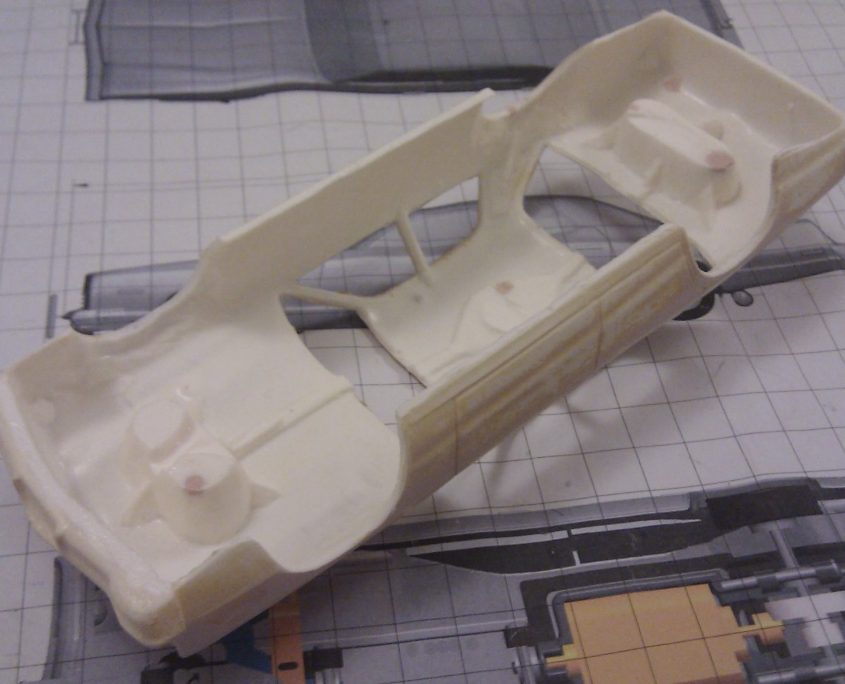
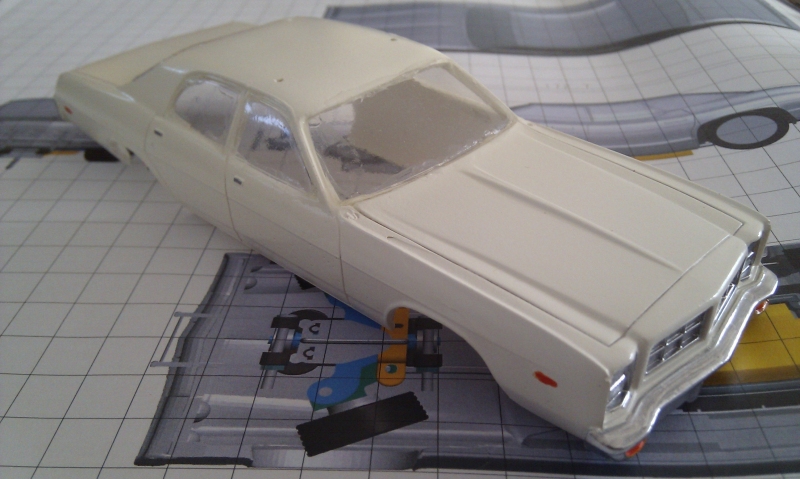
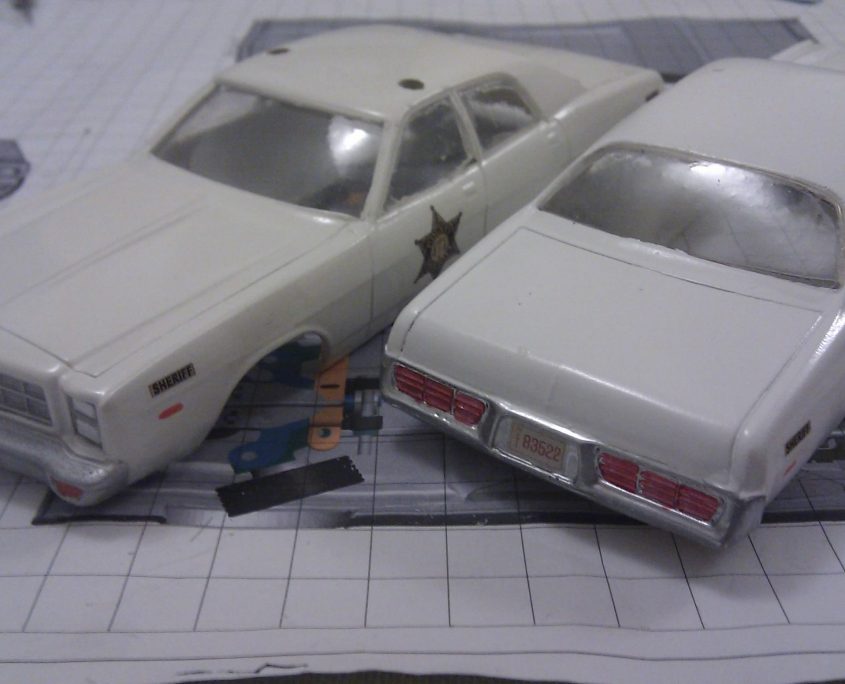
The 1:32 resin bodyshell is cast from a 2 part mould with body mounts already fitted, and the windows are much thinner and easier to cut out than with my older bodyshells.
In the kit you get
- Resin bodyshell
- Vacform windows
- Vacform interior
- Resin driver’s head
- Resin wheel centres
- Waterslide graphics set
Bodyshell preparation is here, detail follows below.
Trial fit the windows to check for size. Don’t get the front pillars too narrow, and remember it’s easier to remove material than add it!
As always with resin parts, wash them in soapy water to get rid of any mould release agents, then leave them them to dry. Choose your favourite primer and get to it!
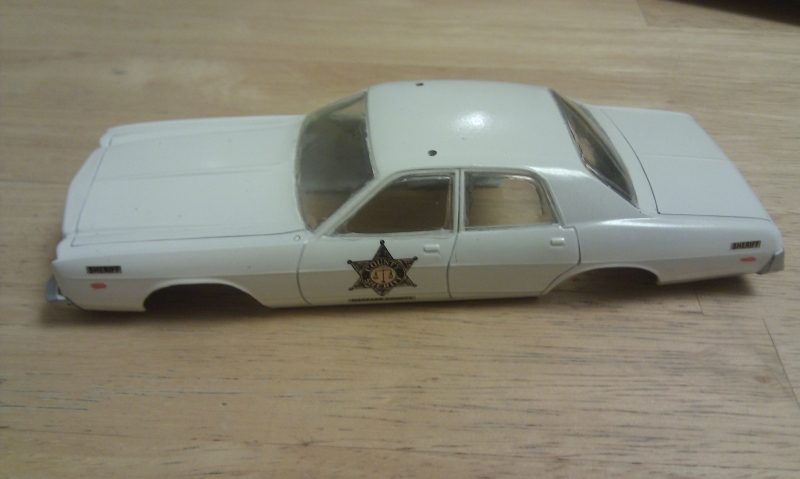
For a white police car, use white primer. I use 3 coats of white primer, sanding lightly with 1200 or 1500 grit between each coat, then 3 coats of white gloss paint on top. Keep the paint thin and turn the bodyshell around so you get paint cover everywhere.
Use orange paint to pick out the side markers and a chrome pen for the radiator grille, door handles and bumpers.
Once all the paint is dry you can do the graphics.
The decals have already been coated with one thin coat of a water based acrylic to help protect them whilst they are applied, however they are very thin and can tear easily. The clear film is continuous and so each decal must be cut carefully from the sheet. Cut with a sharp scissors, craft knife or scalpel but leave a small clear margin around each decal. This will help to prevent any potential solvent ingress when the decals are coated with clear lacquer and will reduce the chance of any ink flaking off.
The decals should be dipped into warm water for 20 seconds and should not be allowed to float off the backing paper in the water. Shake off any loose water, then within 30 seconds, slide into position on the model.
Once the decals are completely dry, apply some clear lacquer to the whole bodyshell to seal the decals and protect the paint. Next fit the windows.
Cut out the vacform windows and carefully glue them in place one at a time using glue that doesn’t bloom when dry. Something like canopy glue, or anything that’s specially made for glueing windows in model kit. If you use normal glue it’ll mist up!
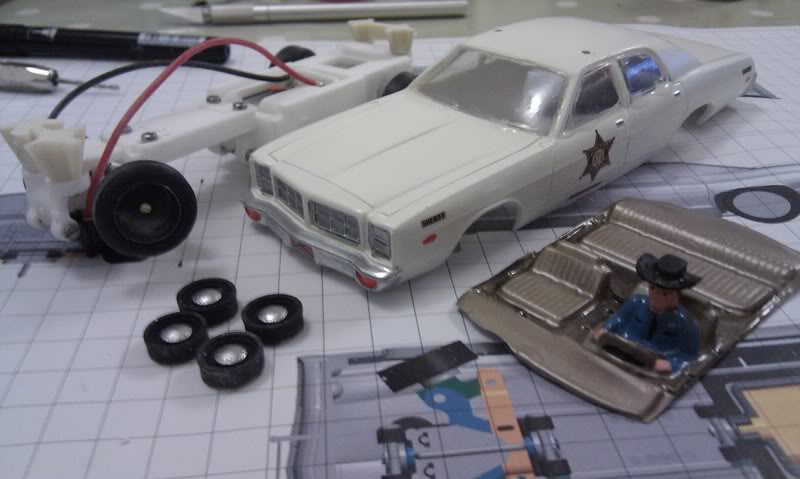
Then cut the interior out, paint and attach the driver’s head. You might need to file the top of his hat to get the interior high enough but it won’t show when the car is on the track