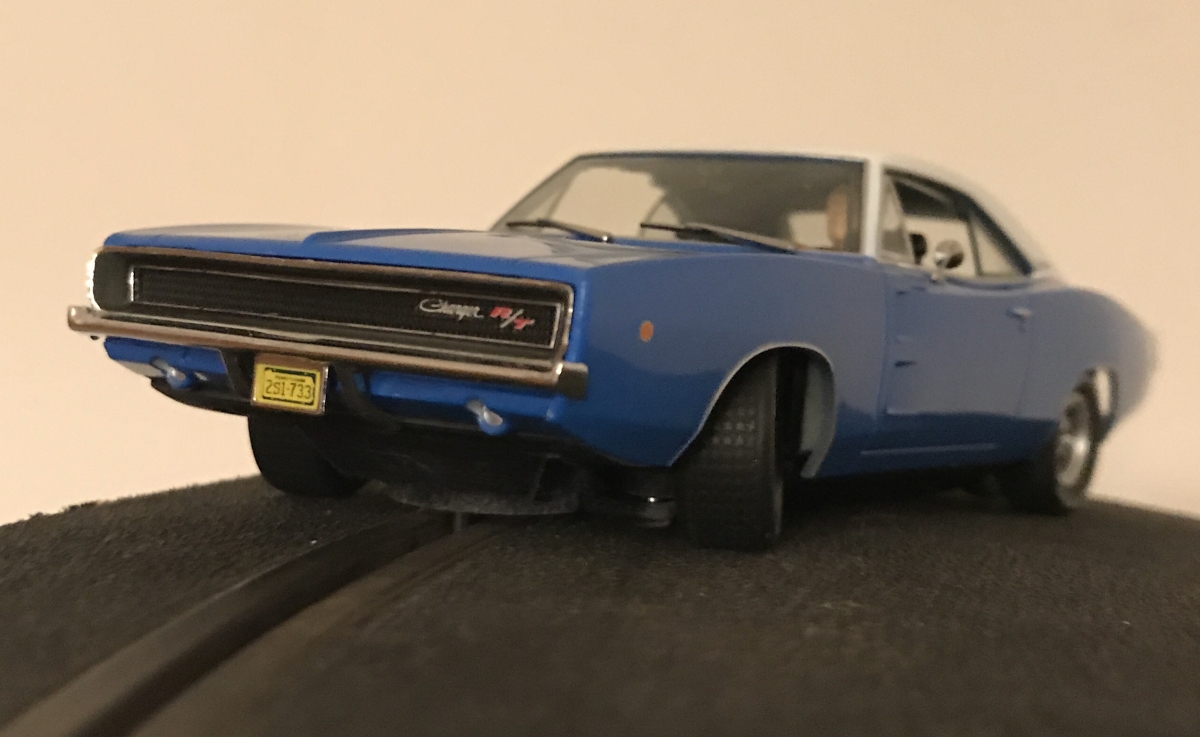
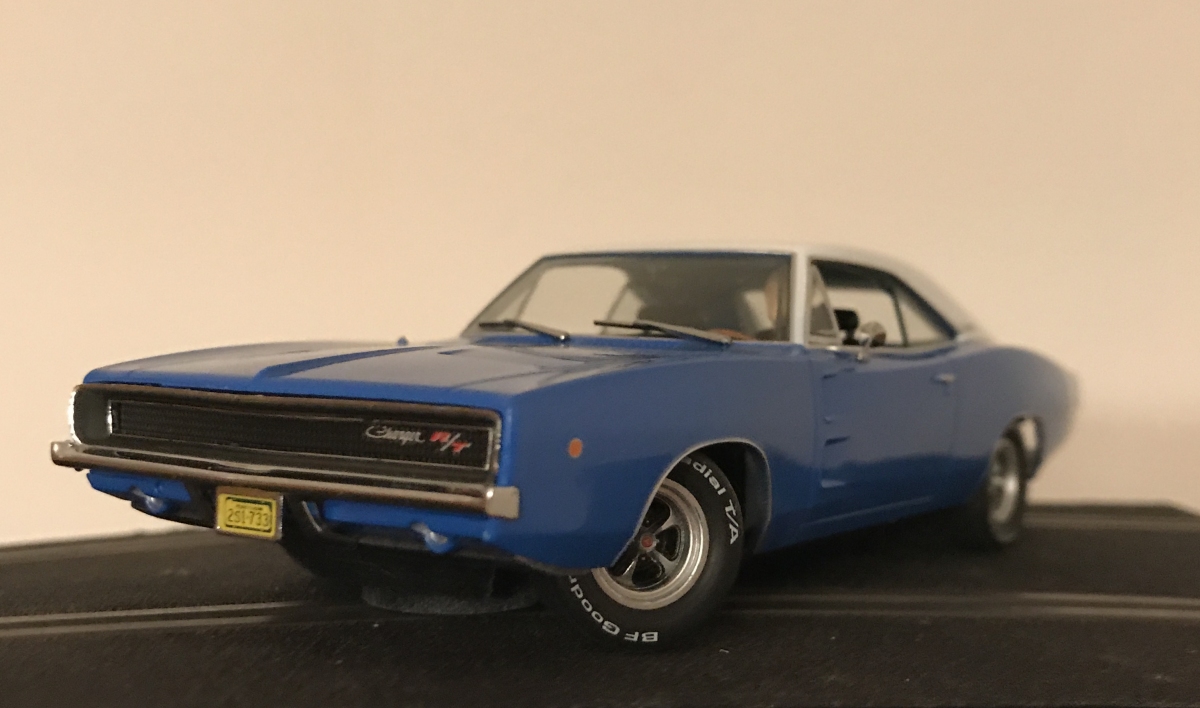
Pioneer slot cars burst onto the scene in 2009 but completely changed everyone’s perception of how good a slot car could look. They have a range of American muscle cars and are loved by racers and collectors alike. How cool would it be to have something that looked as good as a Pioneer, but drove like chase-cars? It would look this cool
The Pioneer chassis is well proven so I chose to use most of it as-is, the only new parts you need are for the front end. If you don’t want to cut your existing chassis, spares are available from your local spares retailer.
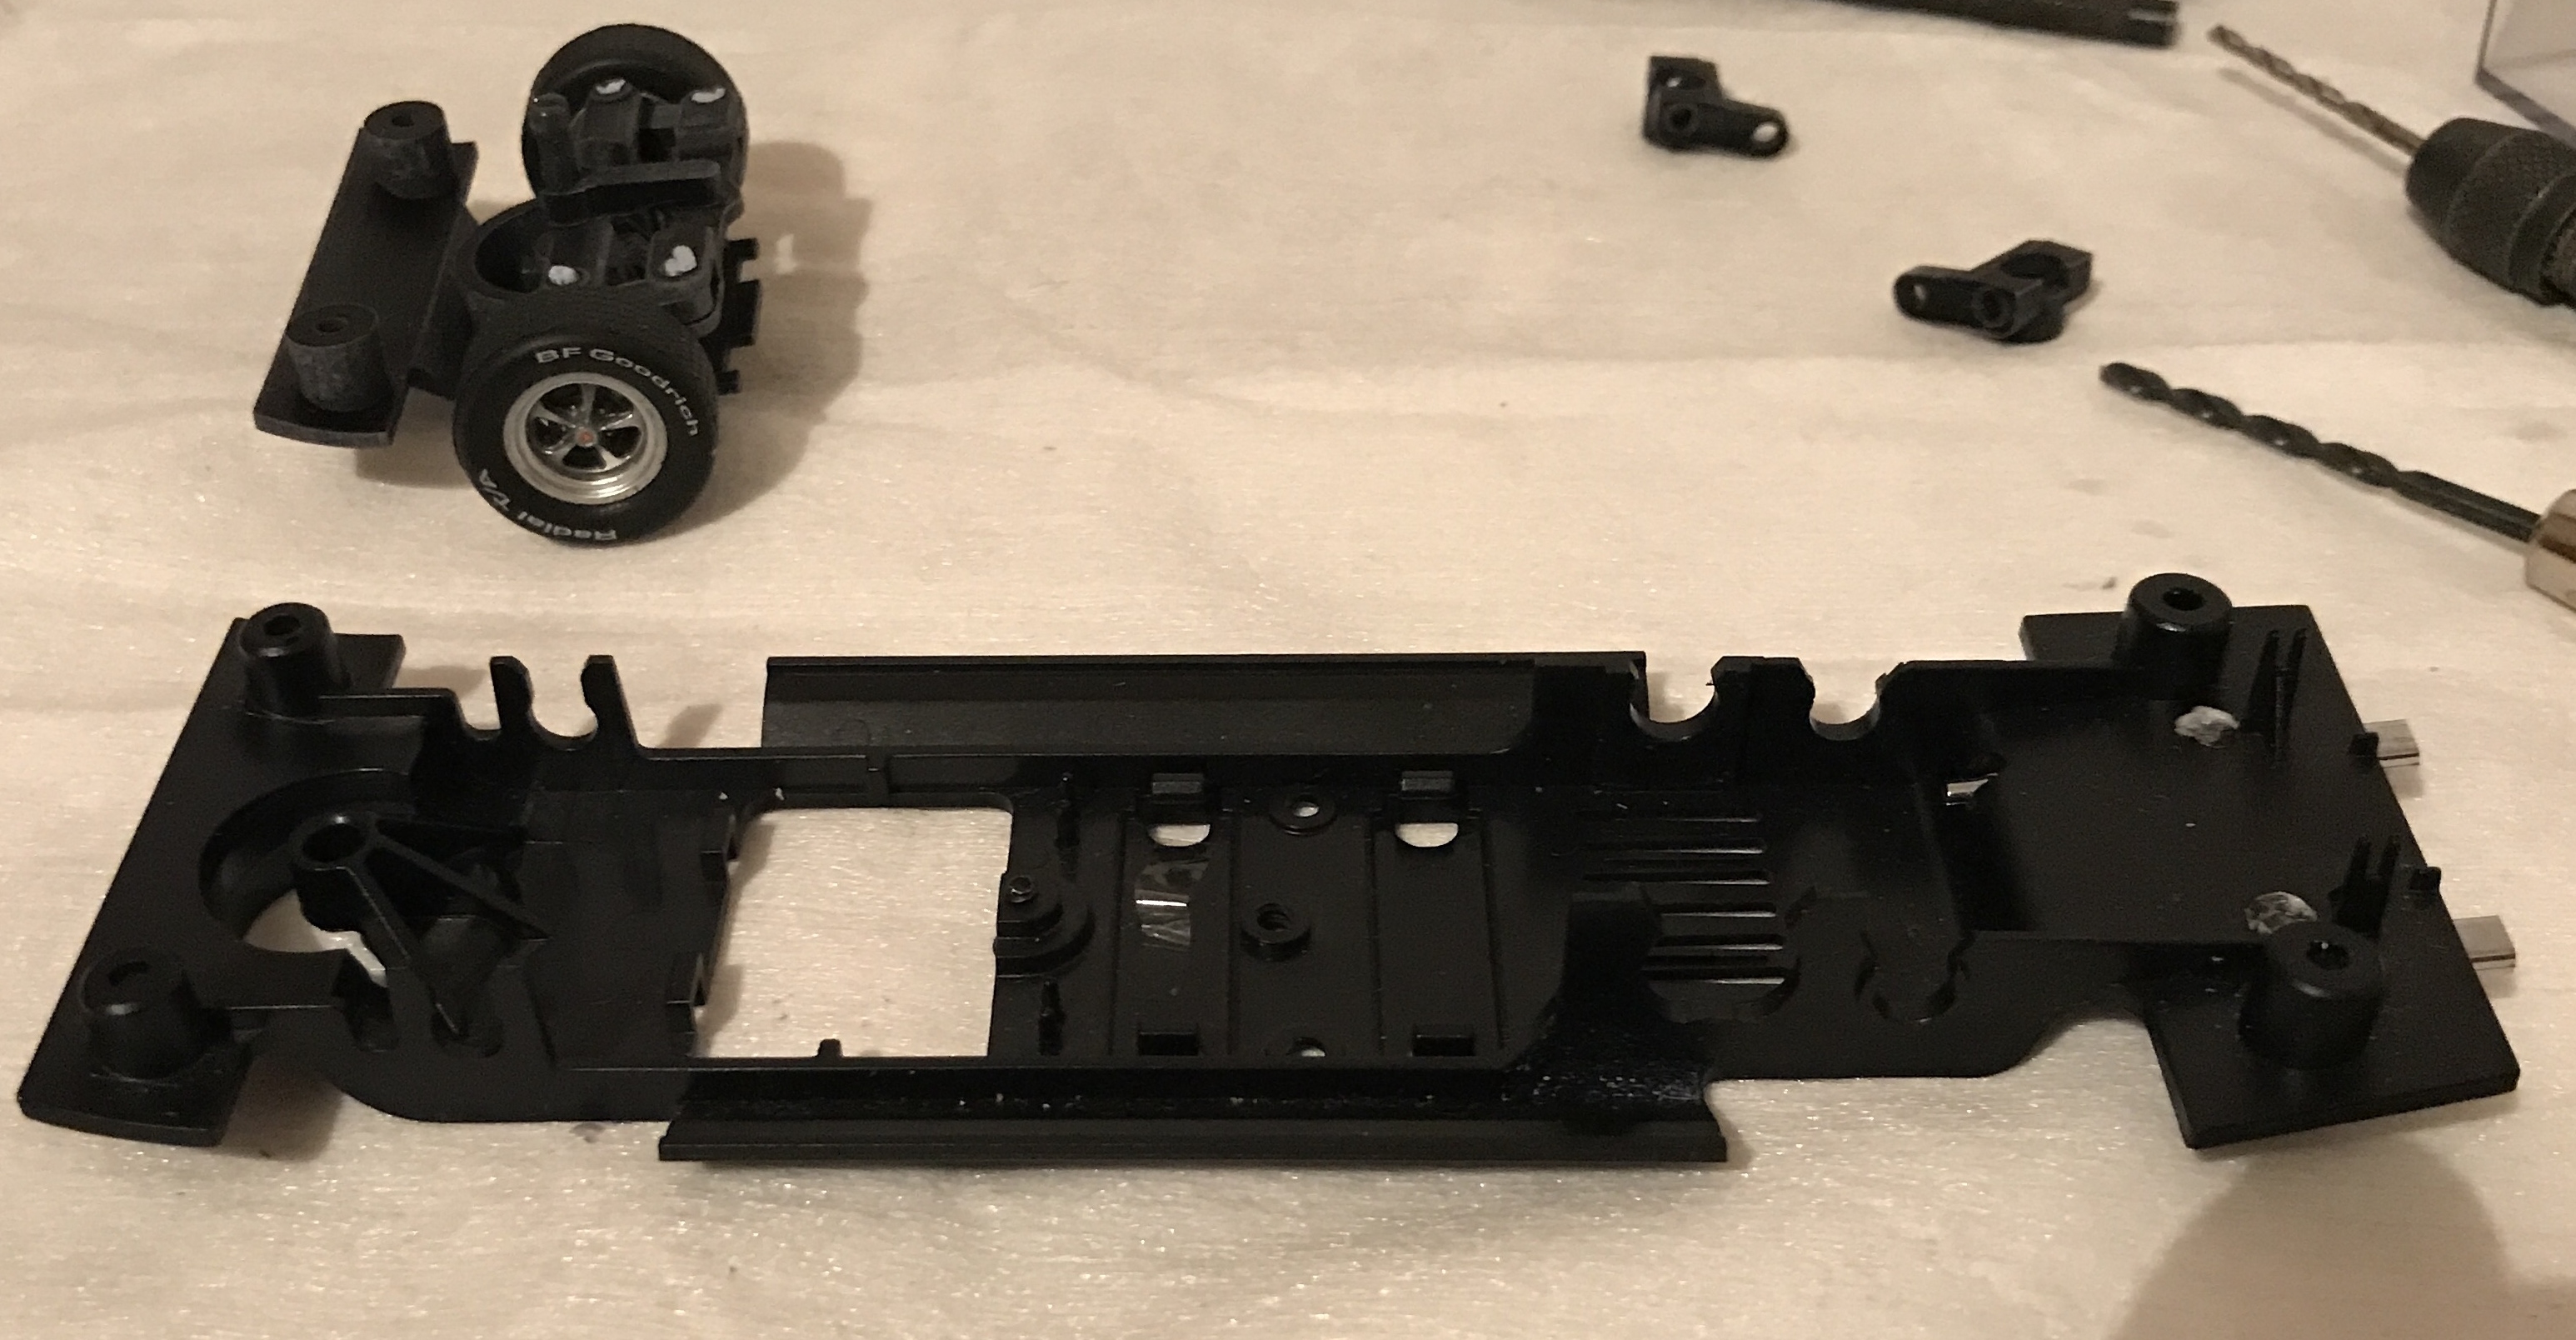
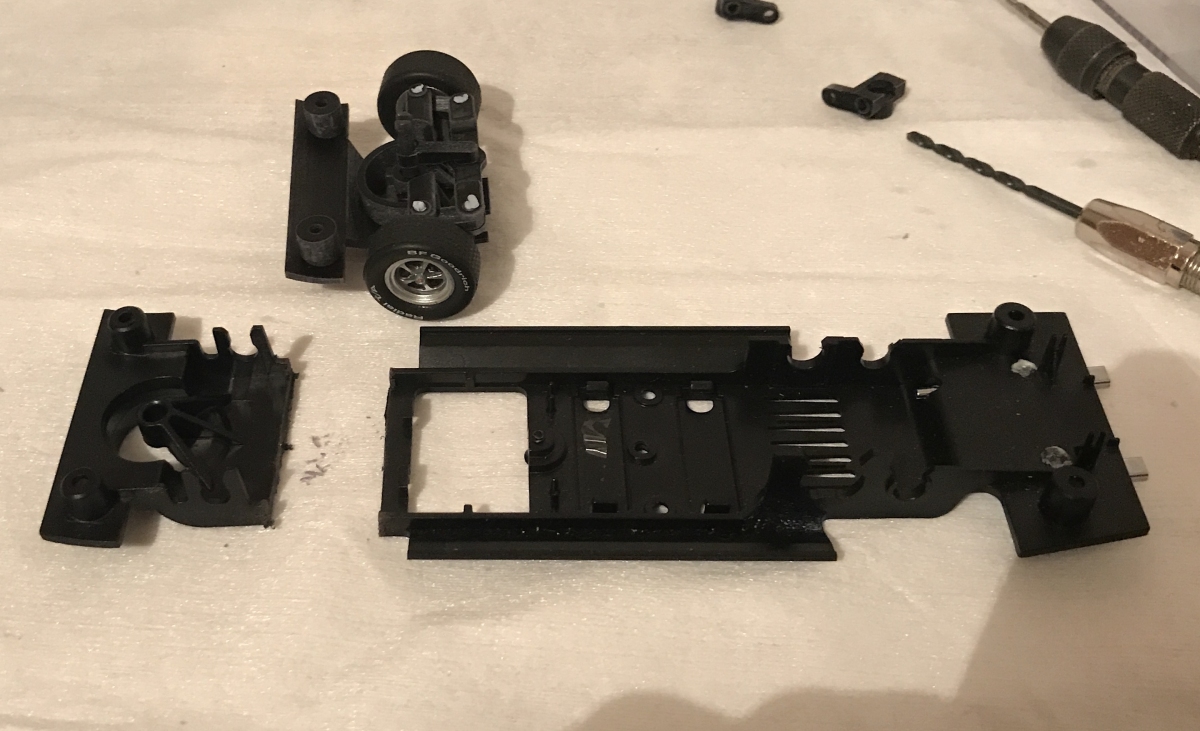
First, undo the screws from the Pioneer chassis and remove it from the body. Gently pull the front wheels off the front axle and put them with all the other parts in the kit.

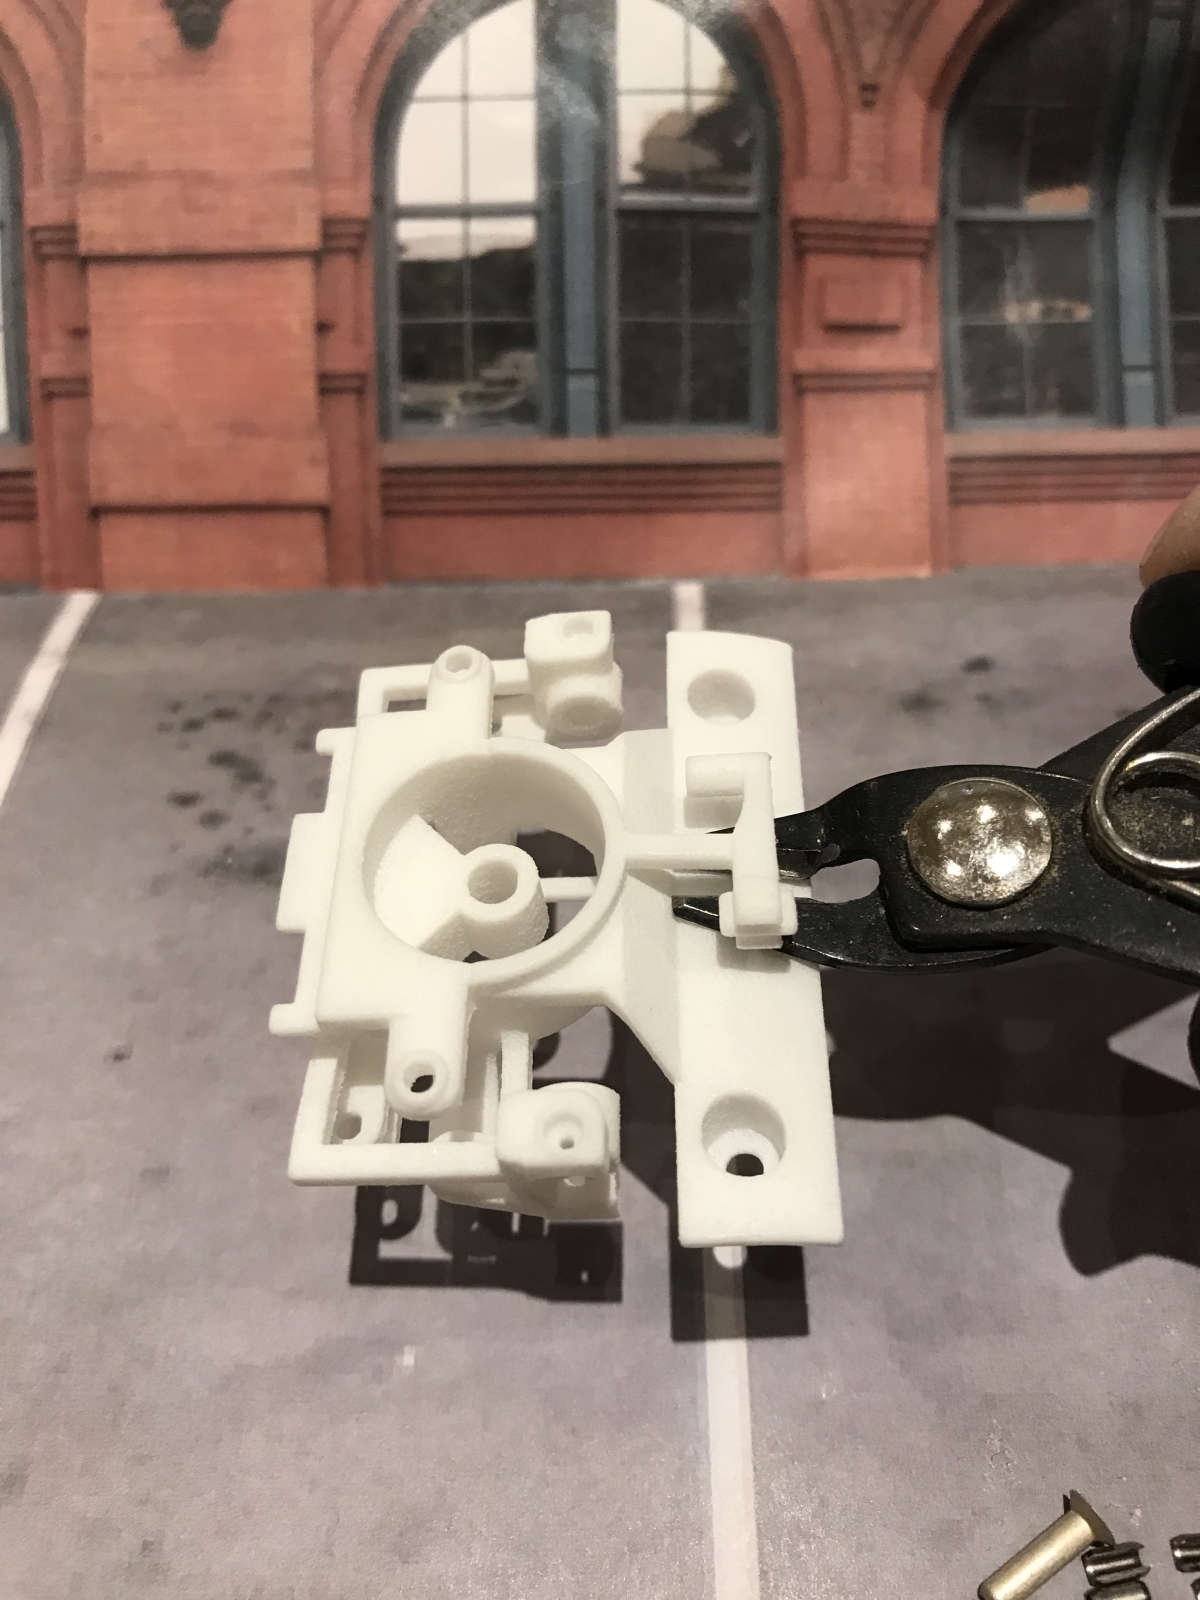
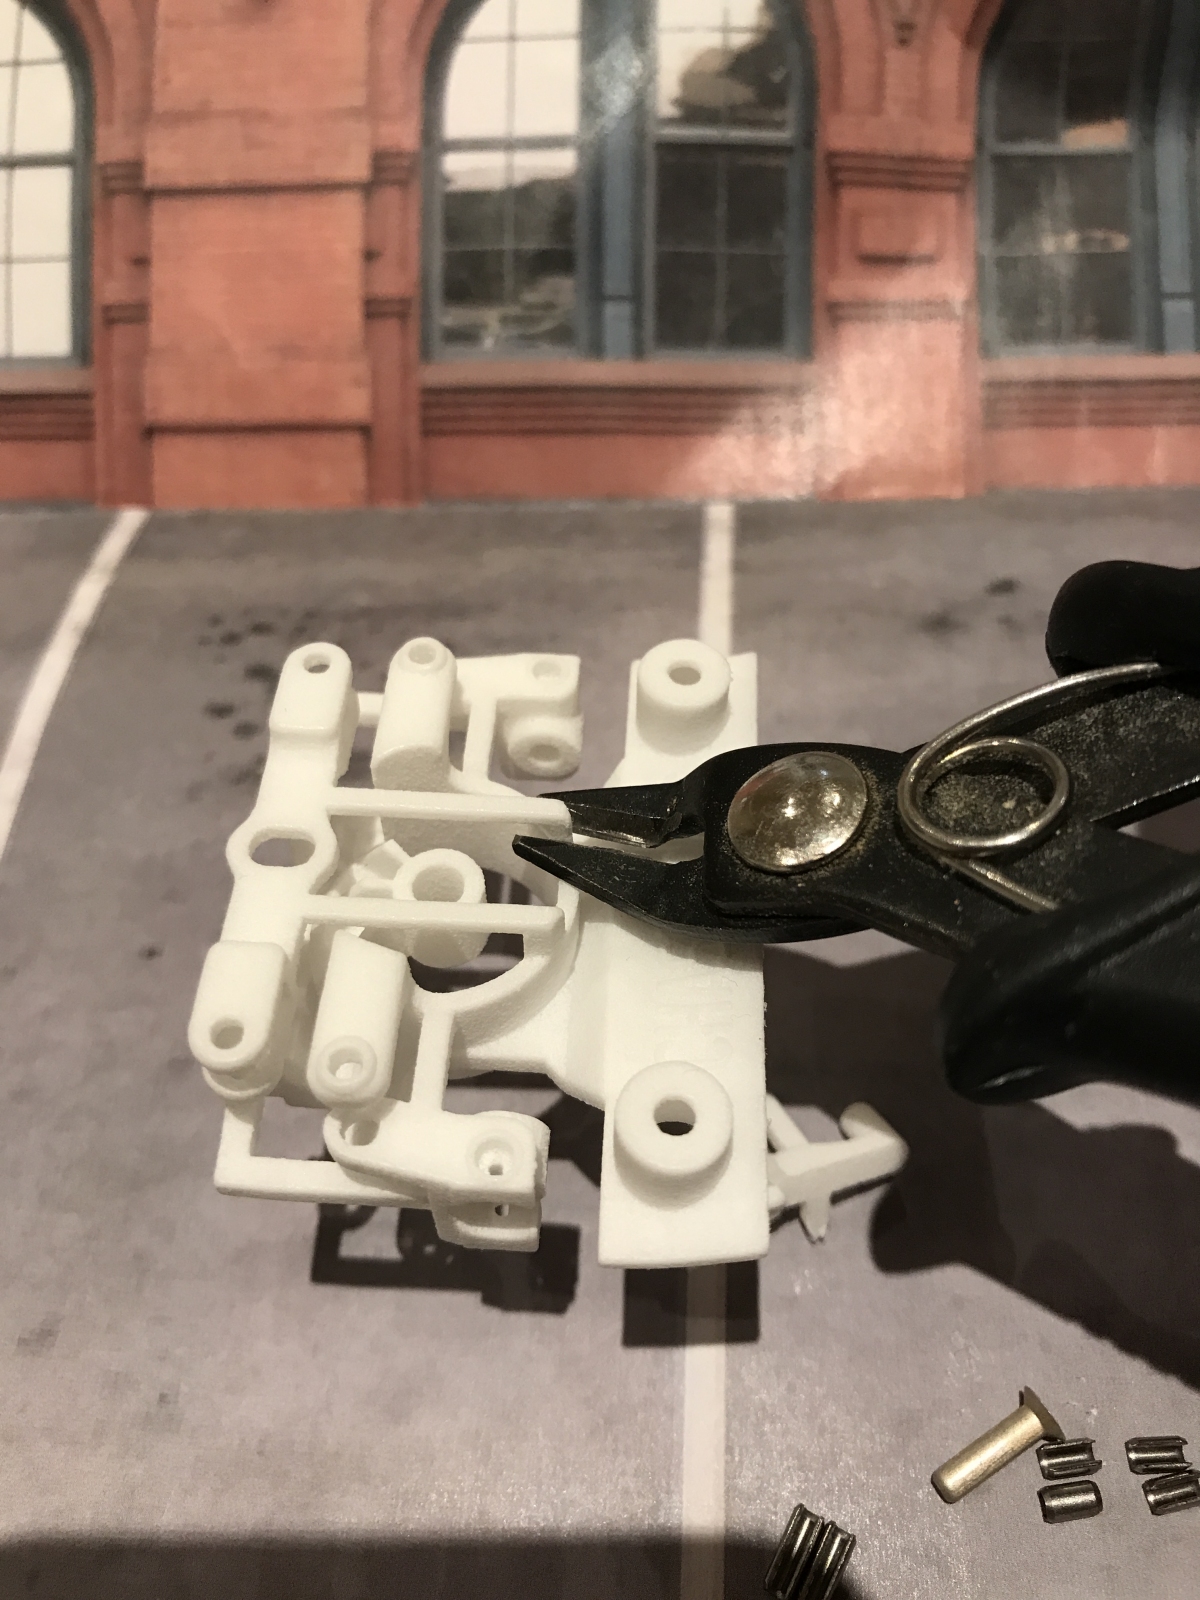
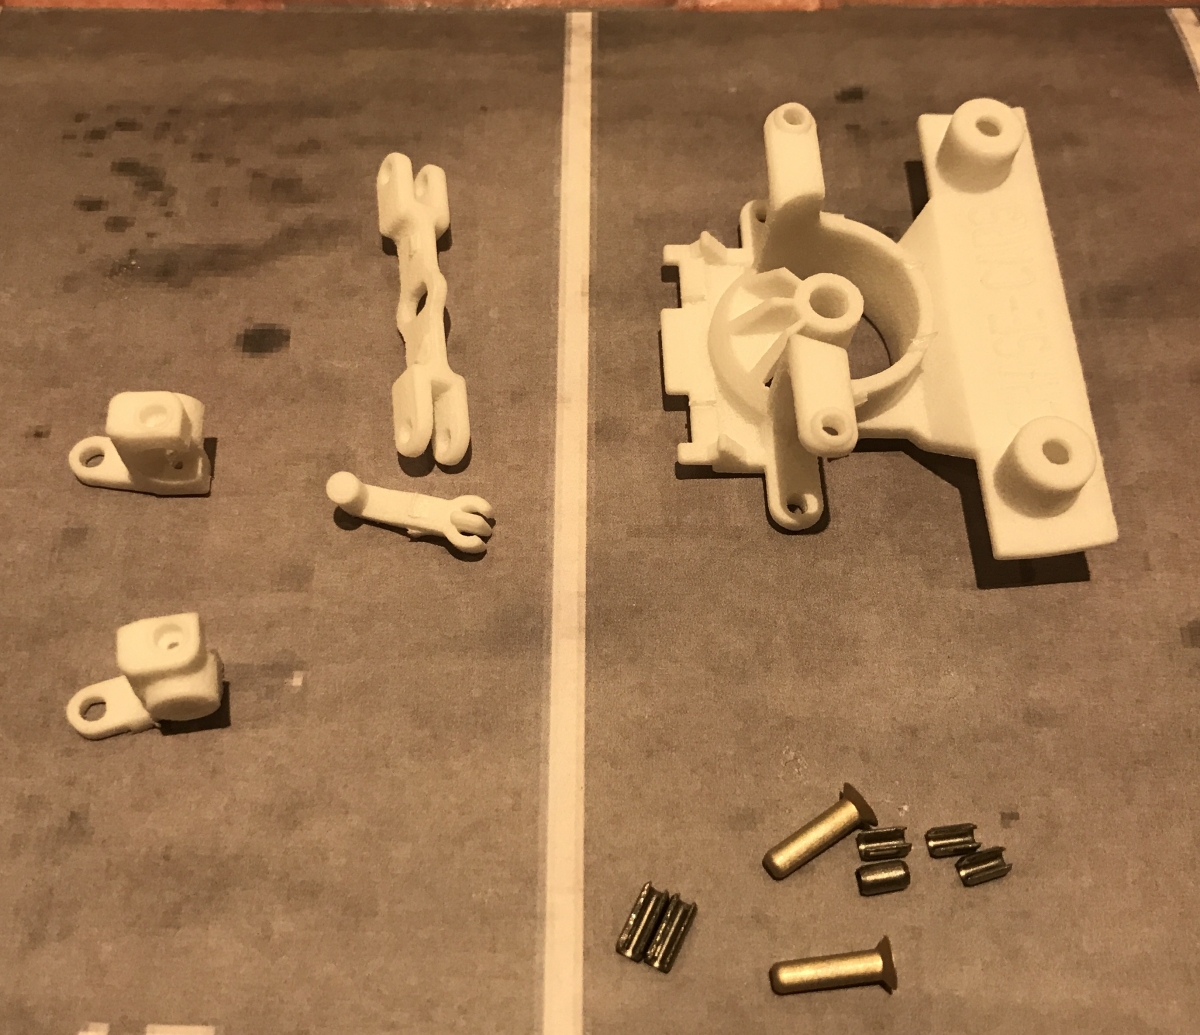
2 stub axles, 4 short link pins, 2 long link pins and a load of precisely engineered plastic. First job is to separate the plastic parts. Let’s do the guide link first.
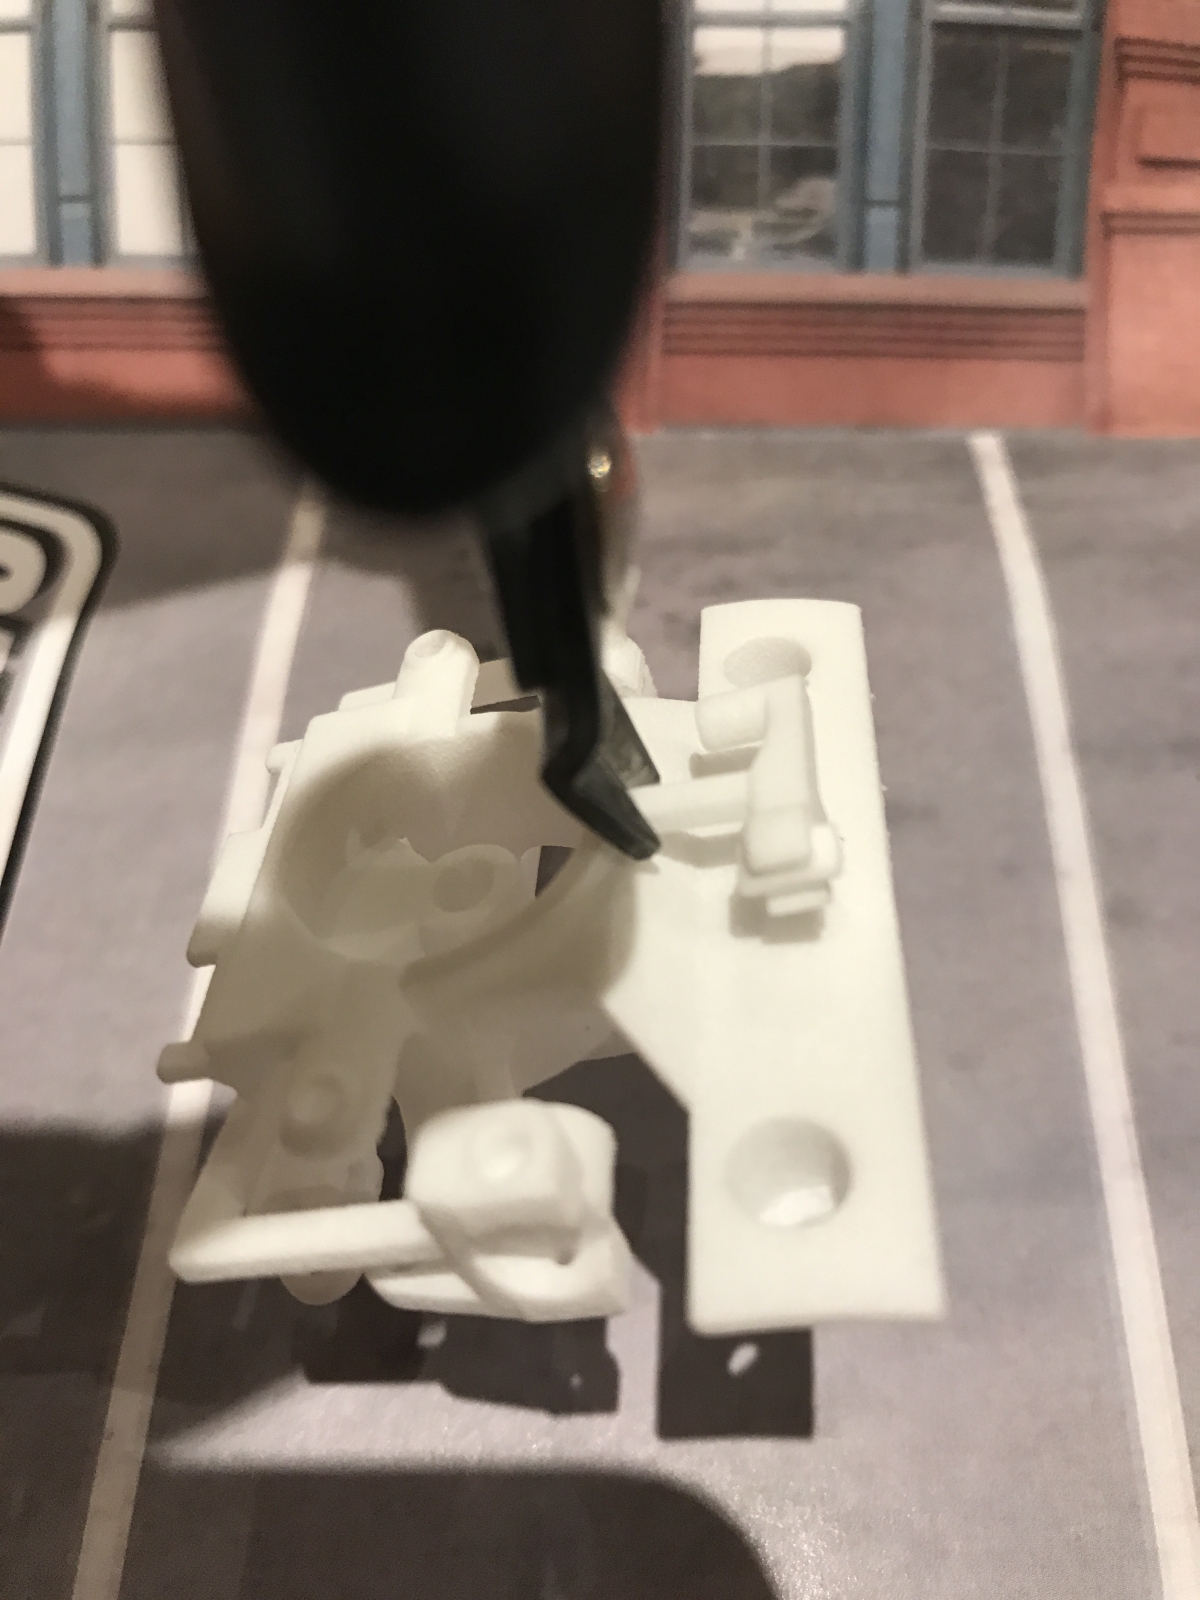
Take your flush side cutters and cut as shown
Then cut here to completely remove the guide link
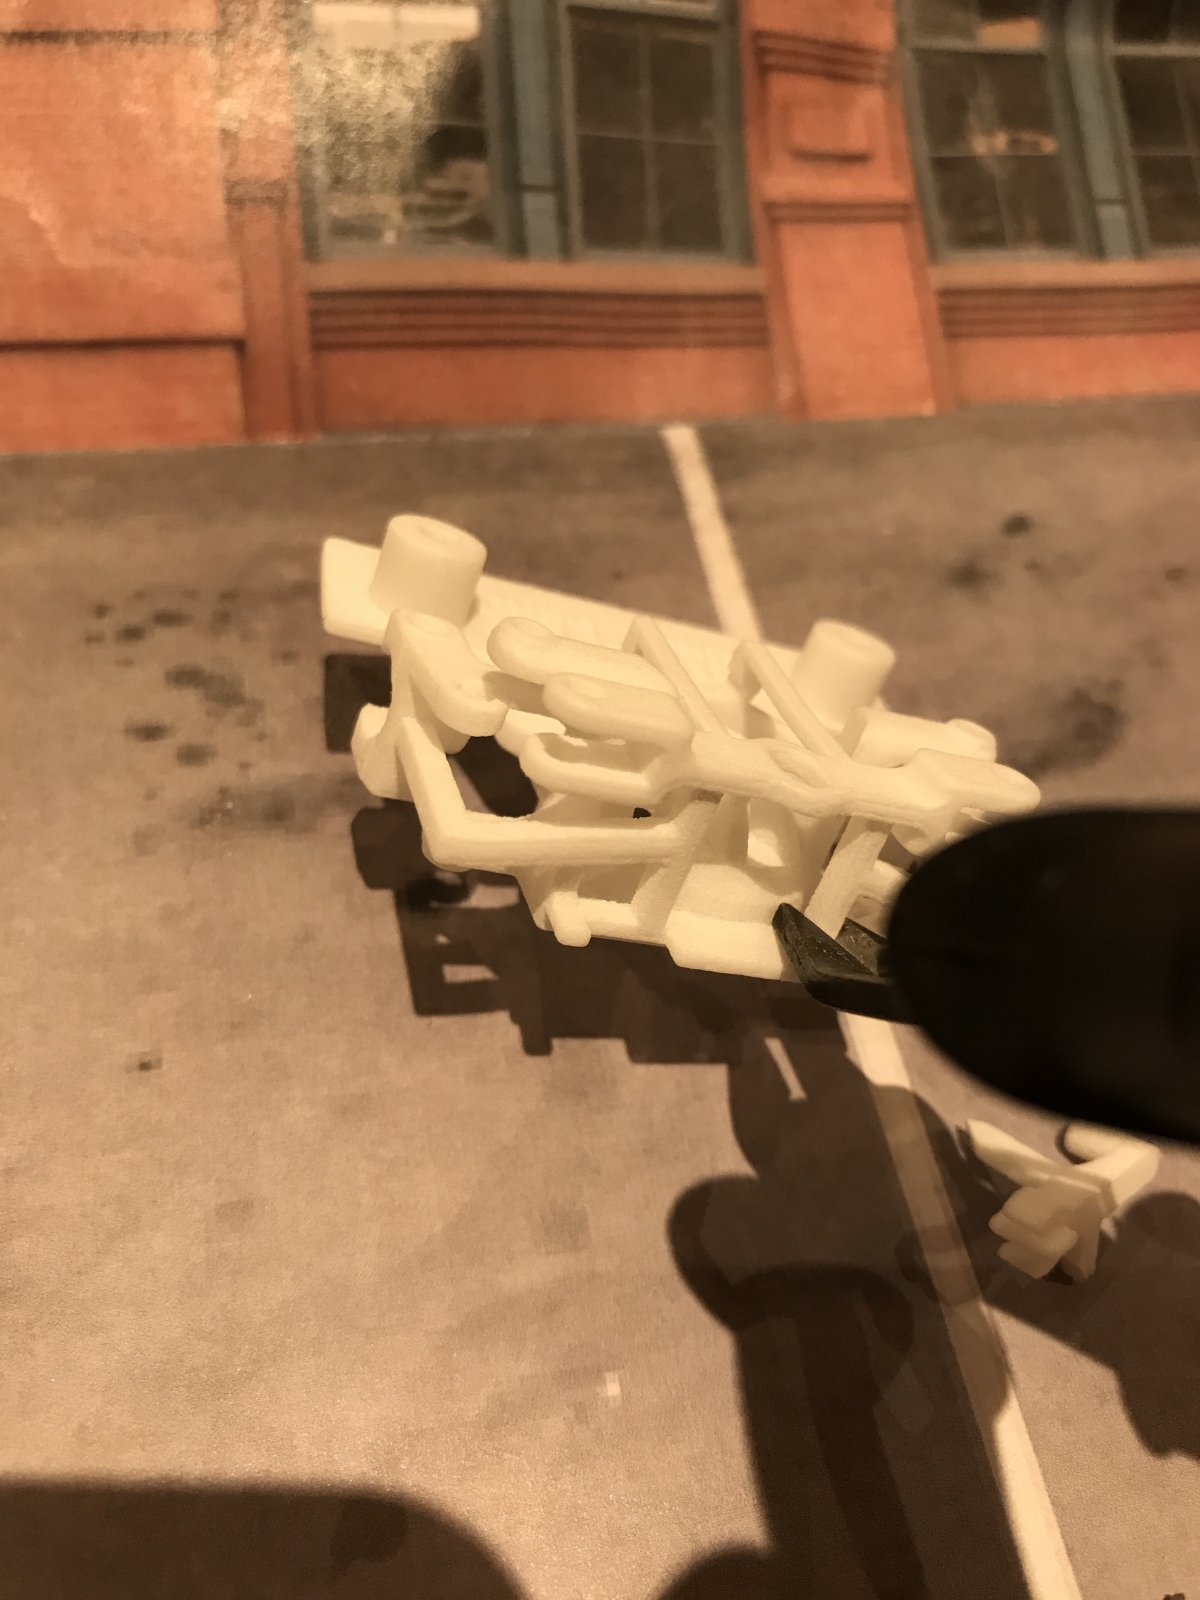
Now we’ll remove all the other parts. Cut like this, left side and right side
Now at the back, left side and right side
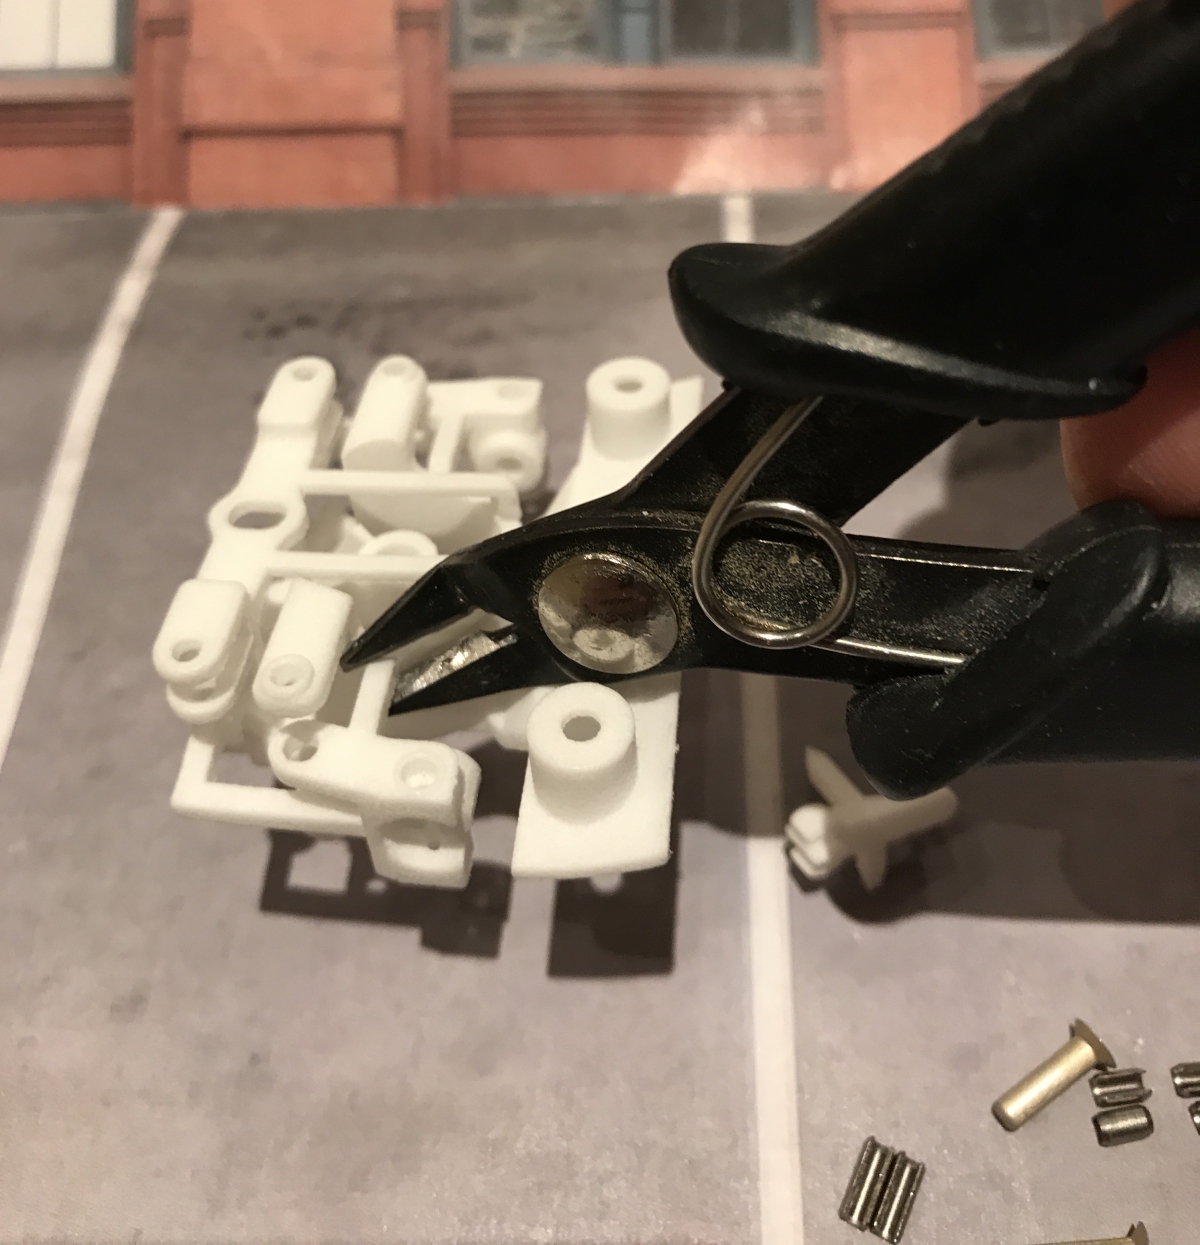
Now we’ll cut away the last of the supports away
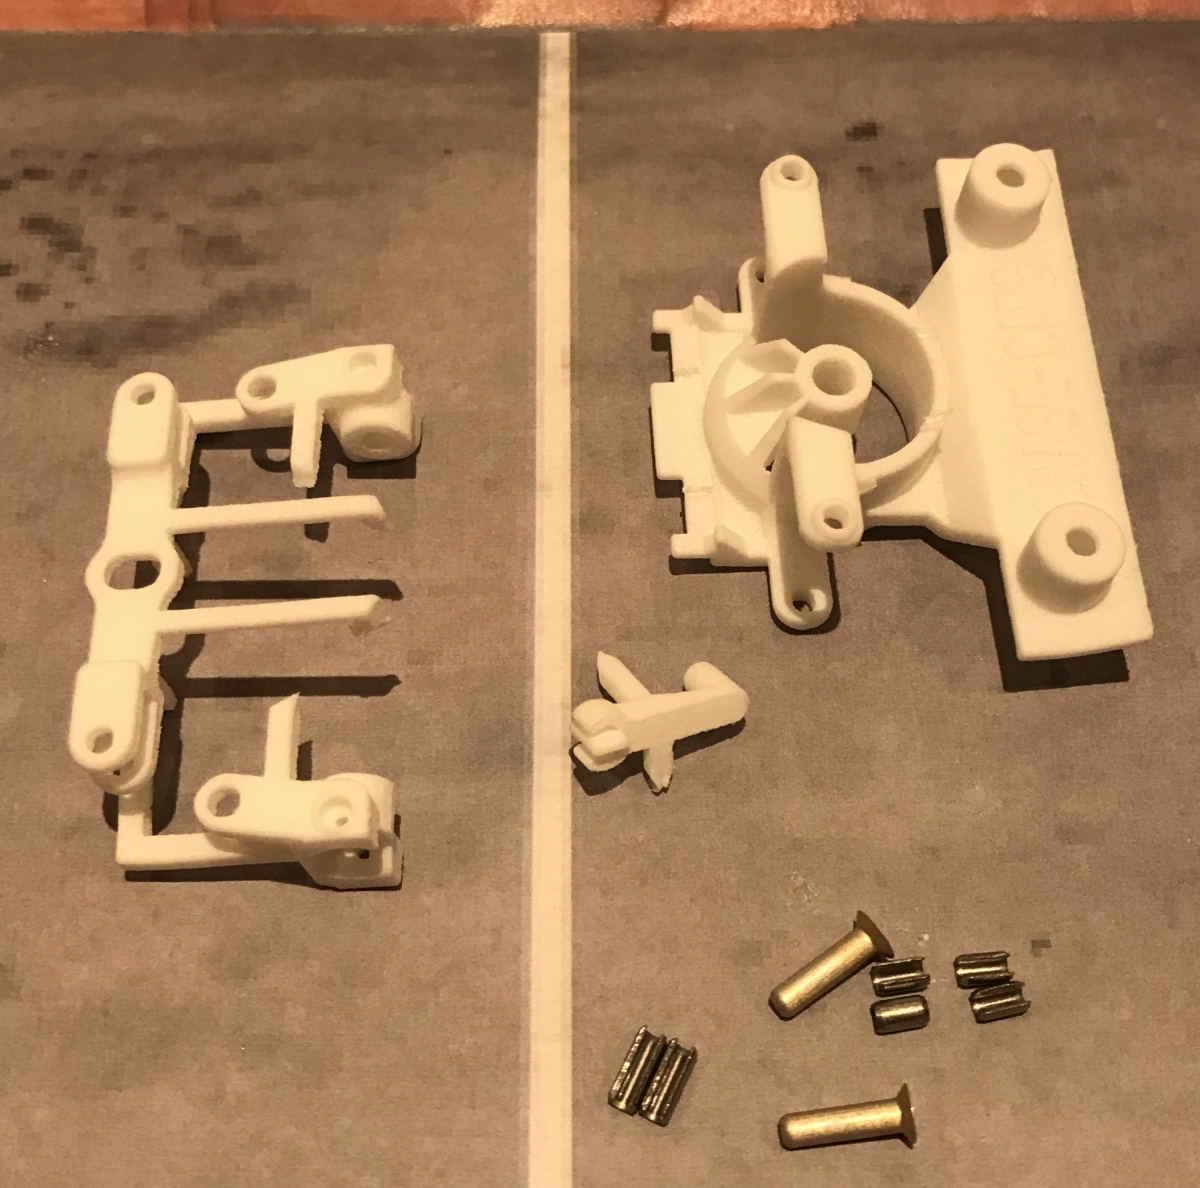
It gives us parts as below
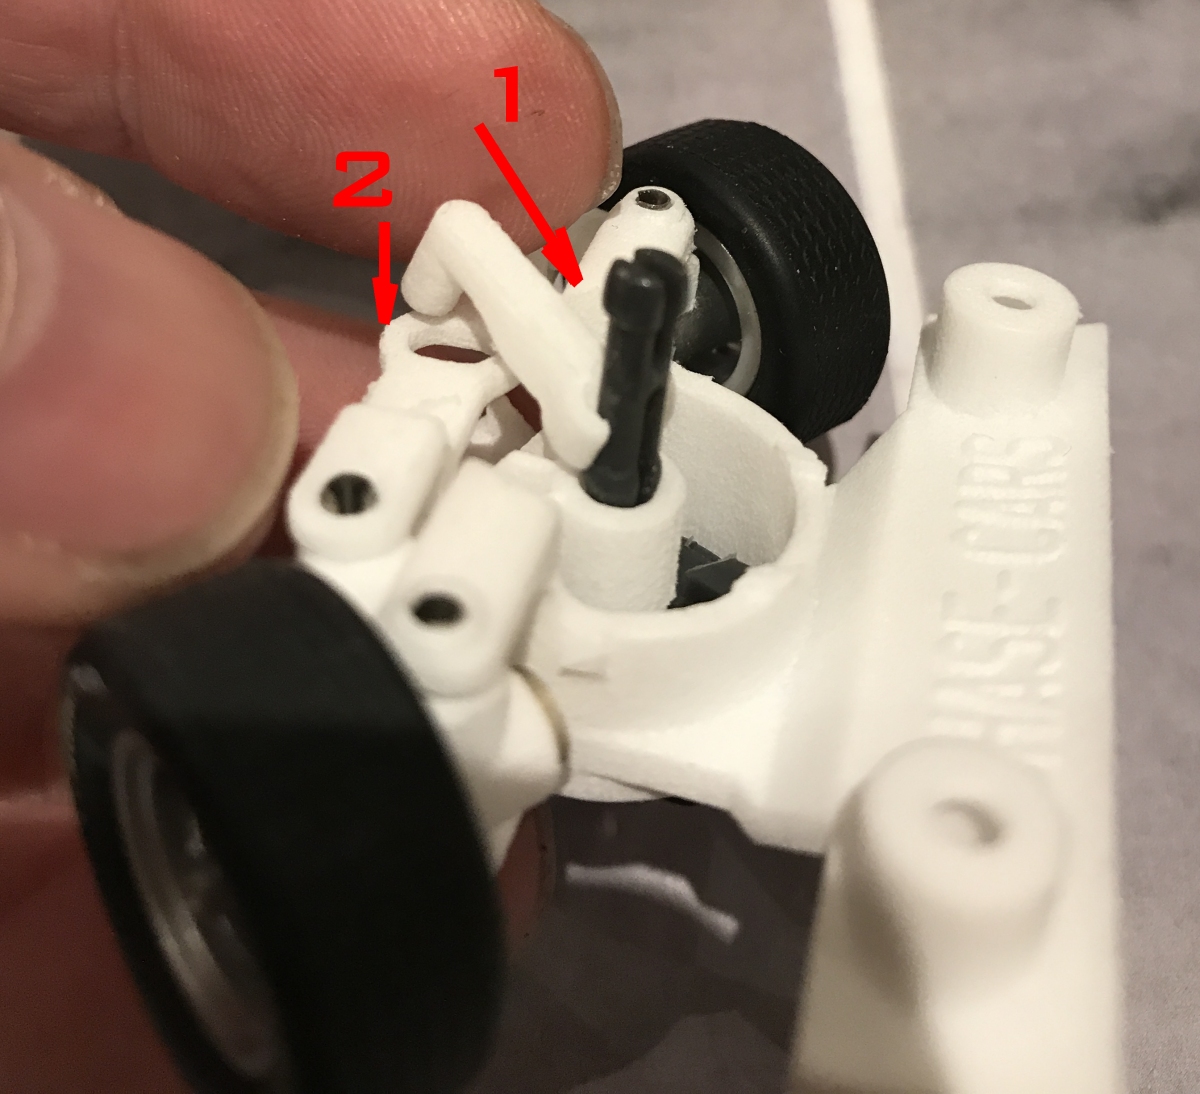
Now we separate the hubs from the steering link
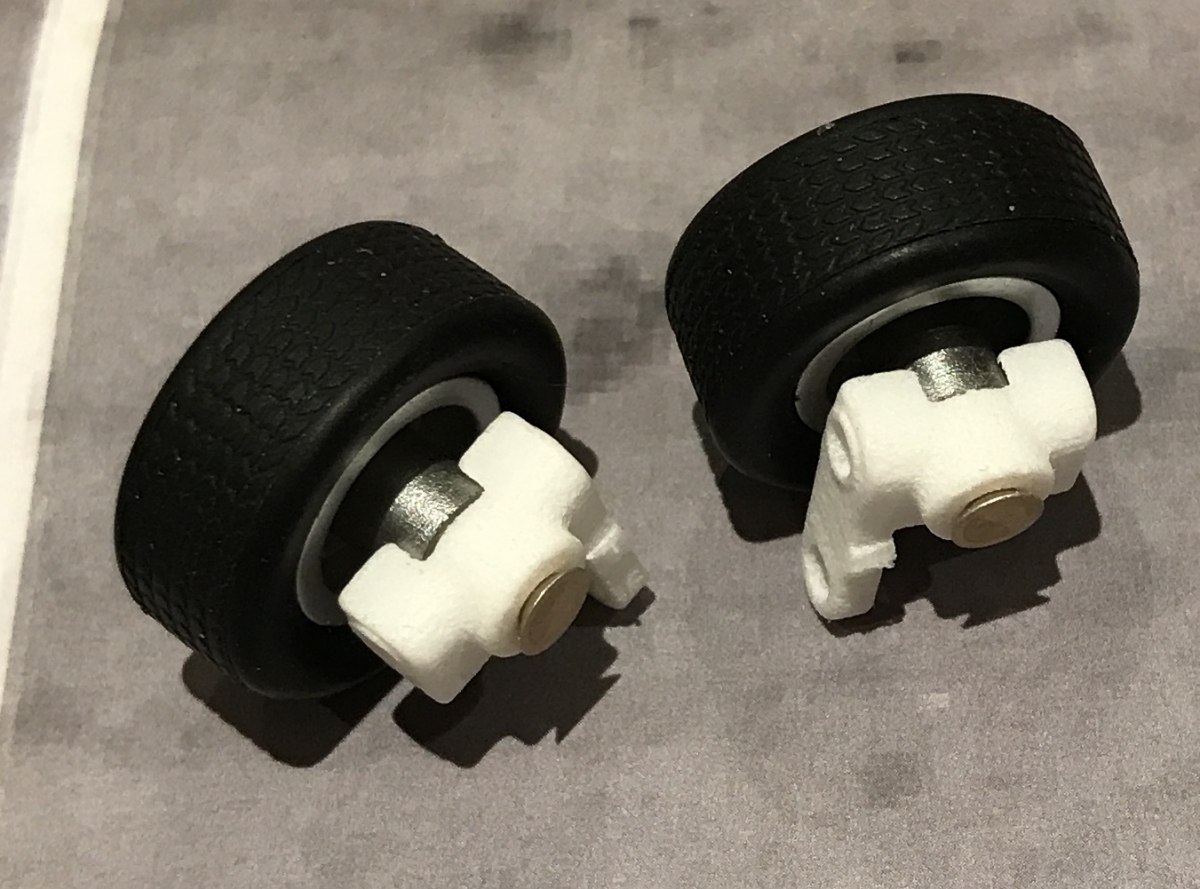
That’s enough of taking things apart, let’s start putting things together. Put the stub axles through the hubs and fit the wheels as shown, orientation is important! Put a tiny spot of superglue on the end of the stub axle to hold the wheel in place.
Now take the four short link pins and push them into the chassis so they’re just showing through into where the hubs fit.
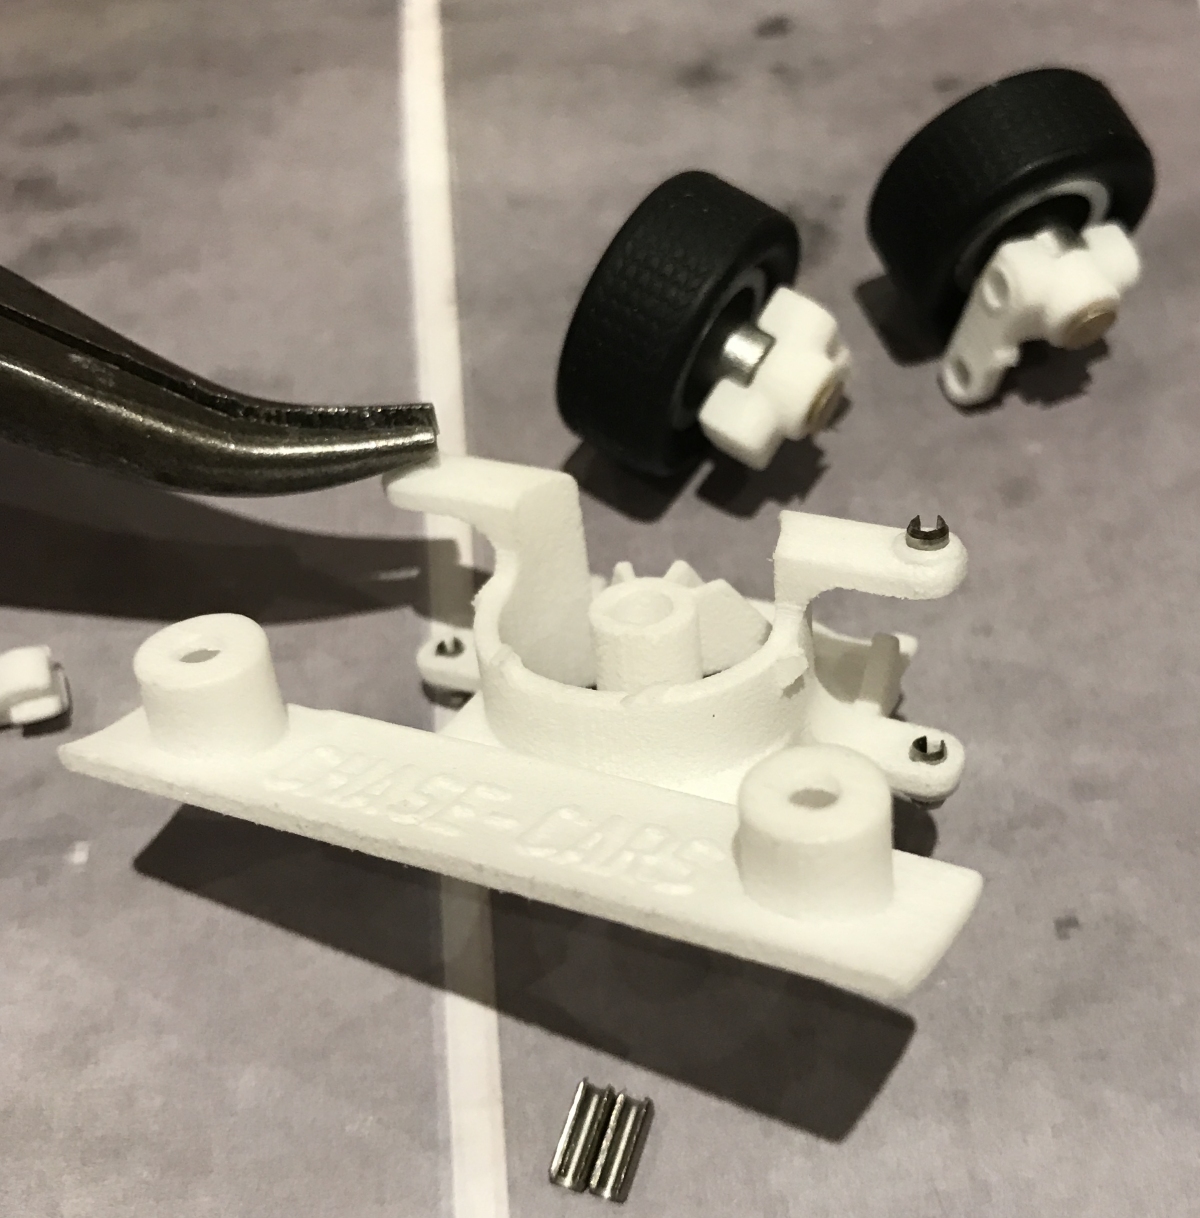
Make sure the hubs are in the right way and push the pins all the way down.
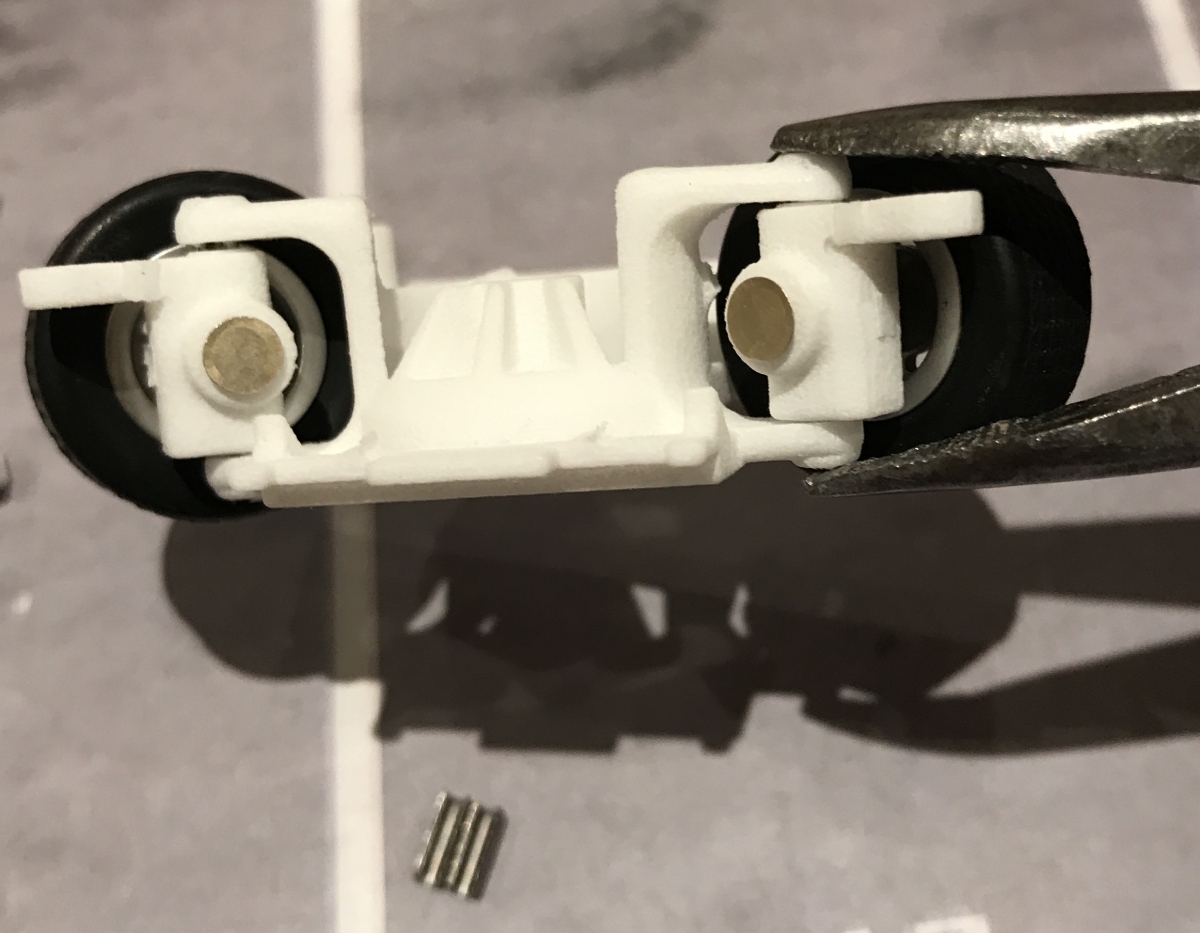
Now take the steering link and fit to the hubs using the 2 long link pins. Orientation doesn’t matter on this part

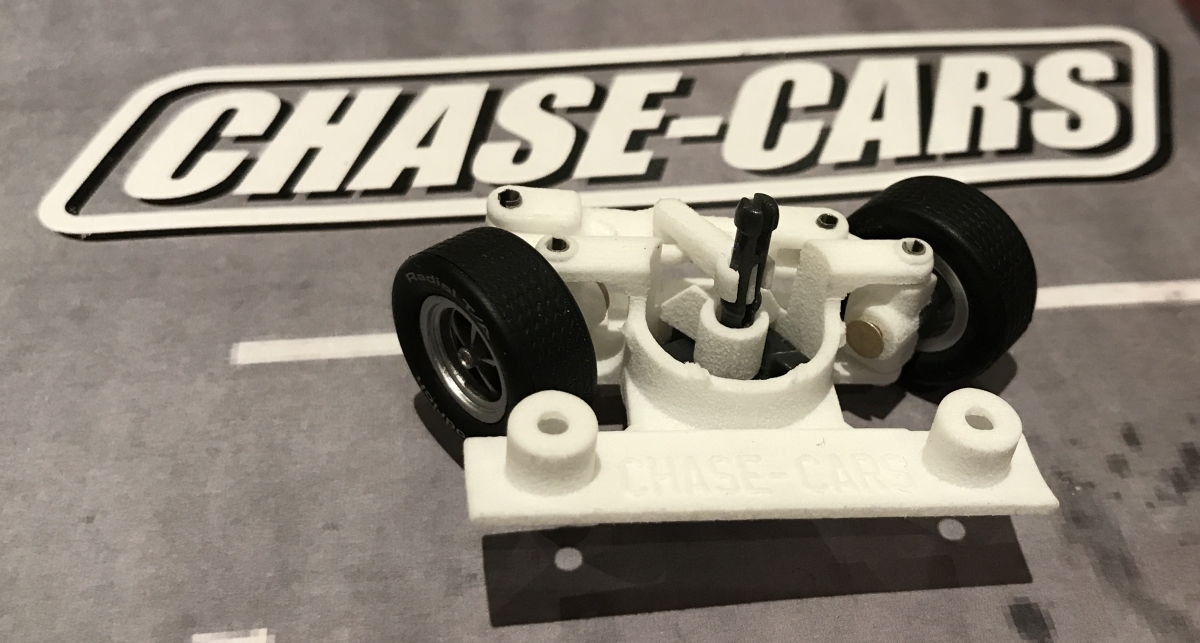
Give it a wiggle to make sure it moves freely, then fit the Pioneer guide. Take the guide link and push it into position as shown
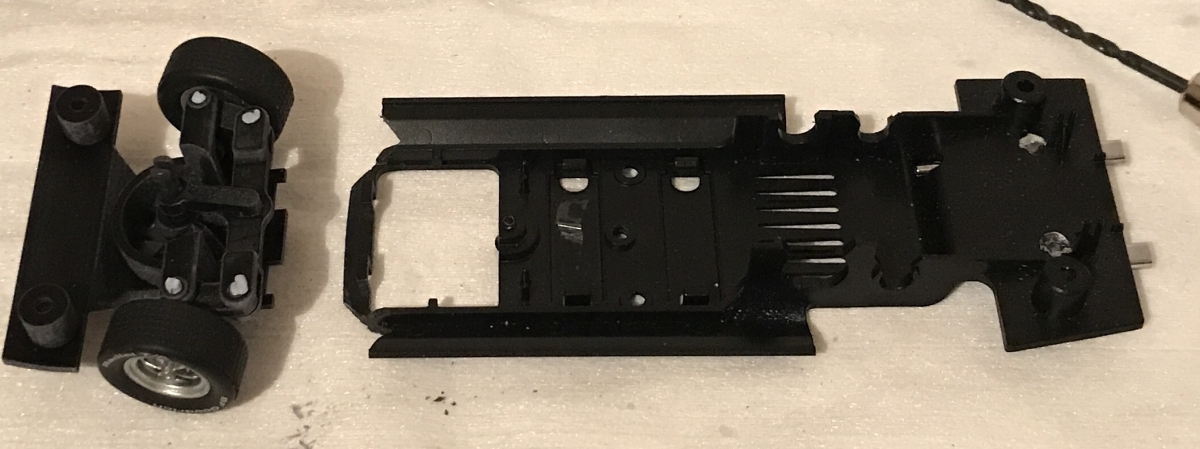
This is how the finished thing looks.


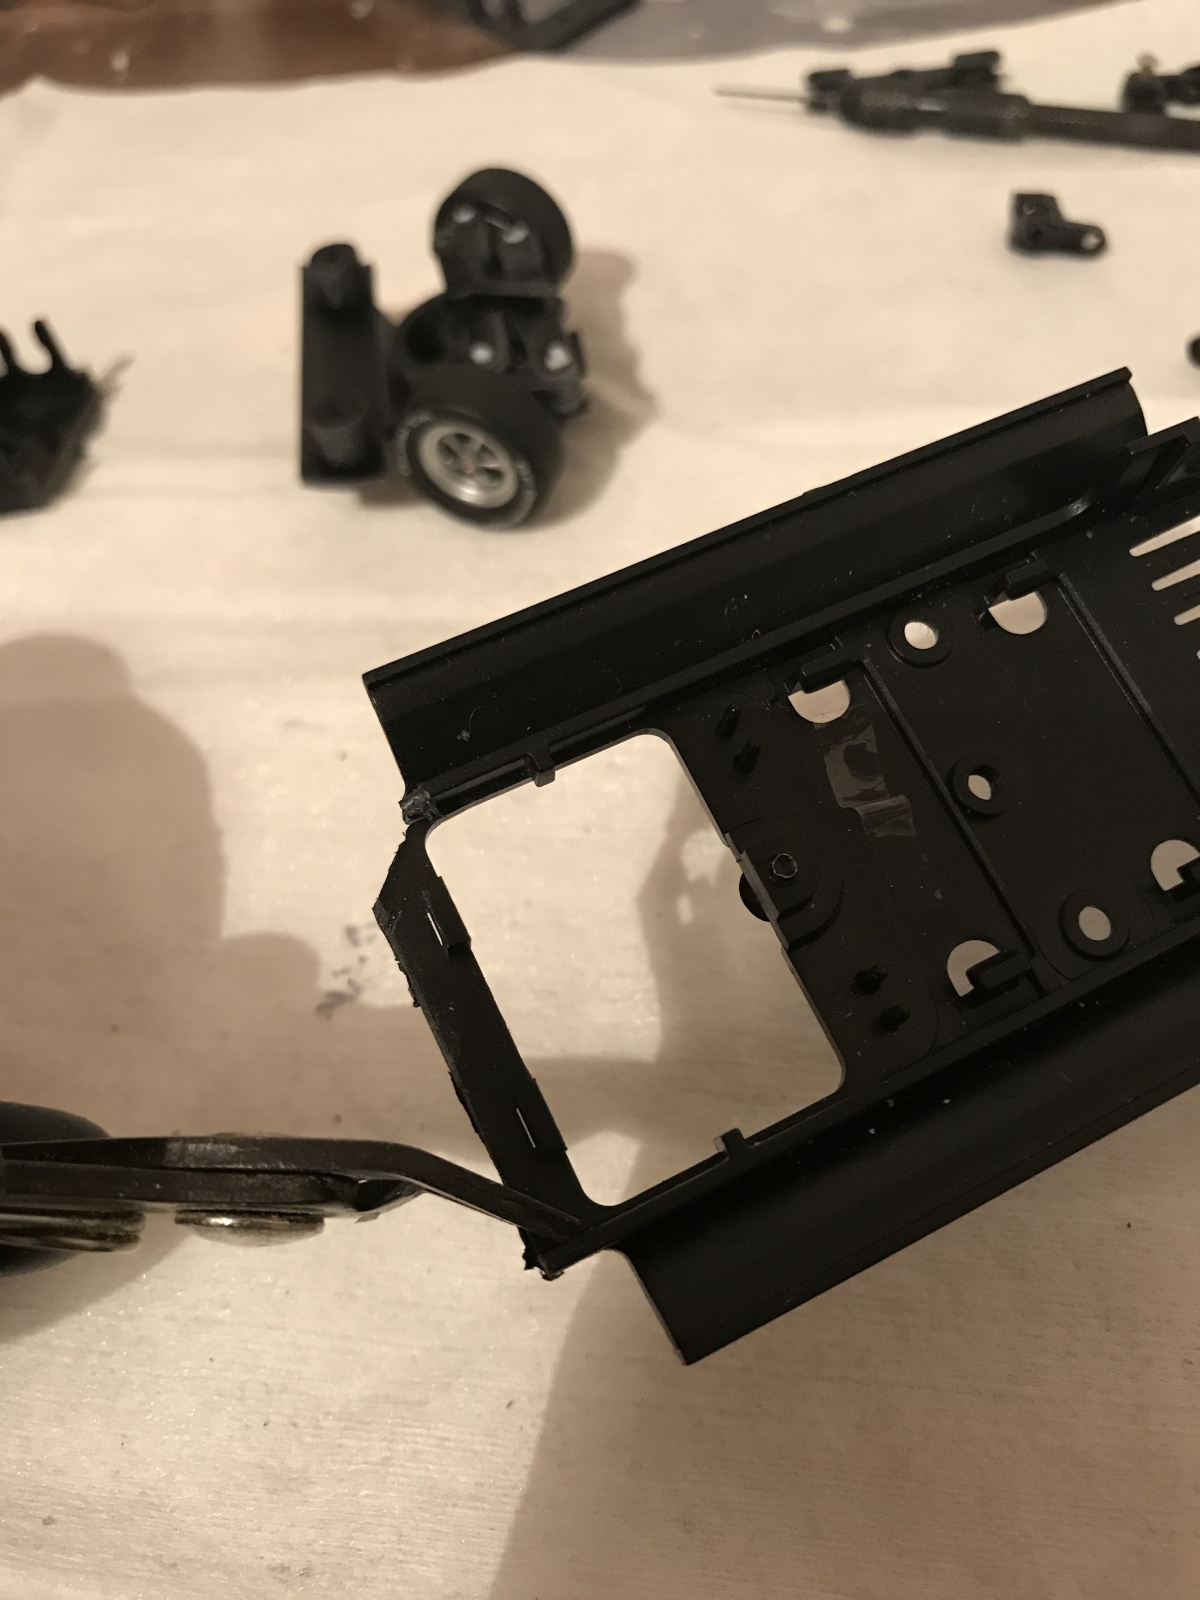
Remove the motor and other parts from your Pioneer chassis too.
Now make a straight cut 2mm ahead of the square lugs for the digital chip. Don’t worry too much about getting it exactly right, there’s an overlap on the new chassis and you use the bodyshell as the alignment jig.
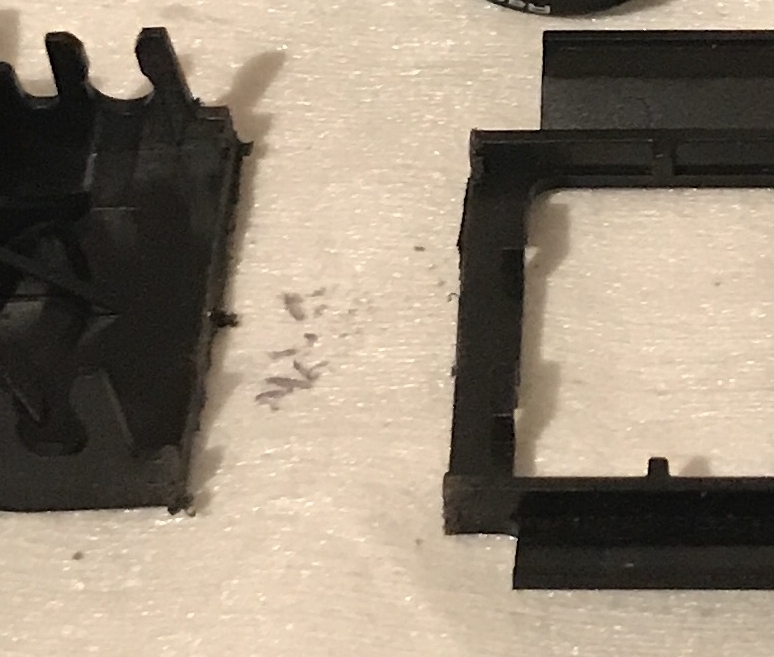
You can probably get it straighter than me, but my terrible modelling skills just show how forgiving the kit is.
As the wheels steer, they need clearance on the old chassis. Take a side cutters (easier than a saw for small cuts) and make it look like the picture below.
The rear chassis also needs a small cut on the sides where the body rockers (sills in the UK) are, as below.
Now take the bodyshell and line up the chassis holes. Check for clearance with the steering wheels and once you’re happy with the fit, apply a small amount of glue to hold the old and new parts together.
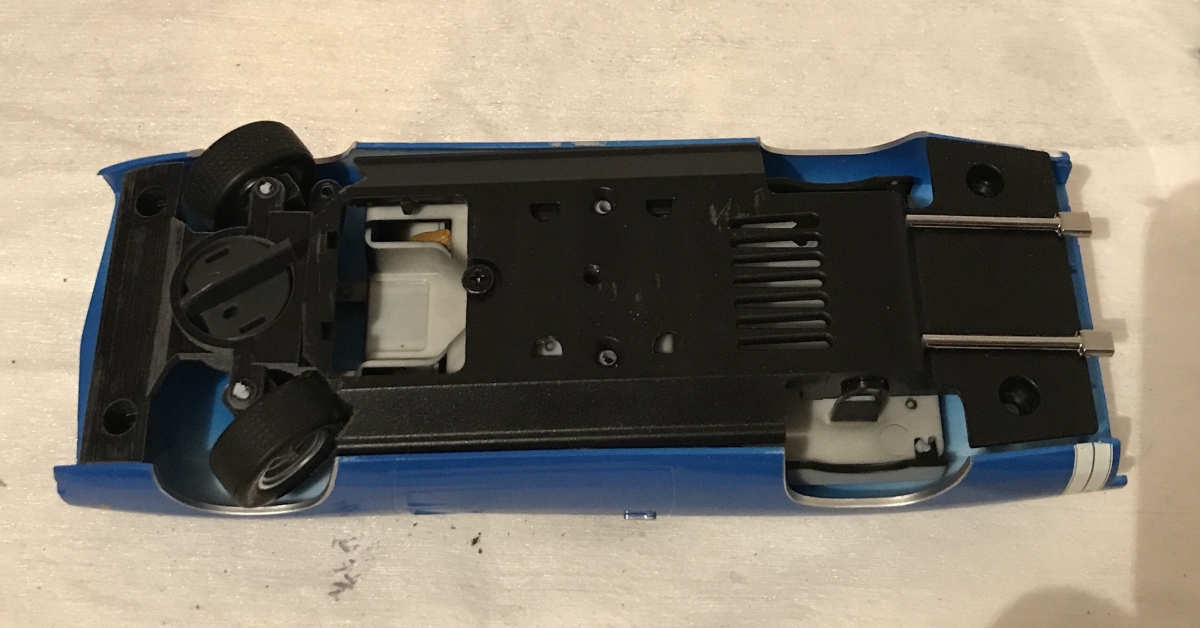
Remove the chassis once the glue has dried and put a tiny blob of glue on the metal link pins so they don’t work loose and that’s it! You’re on your way