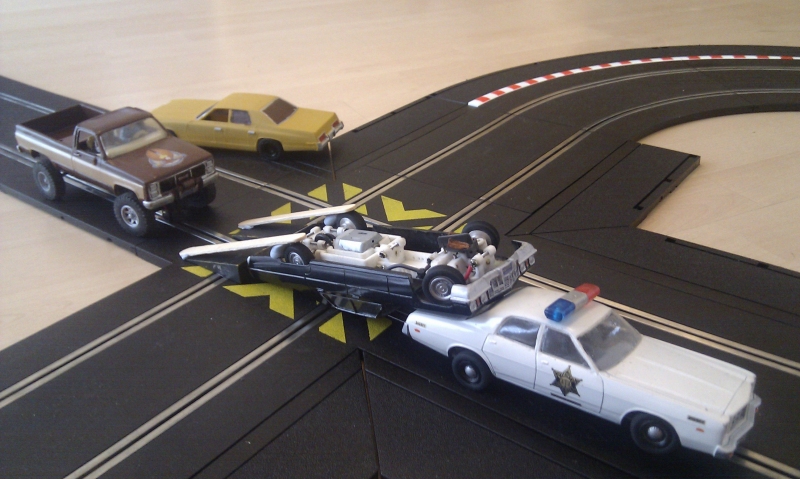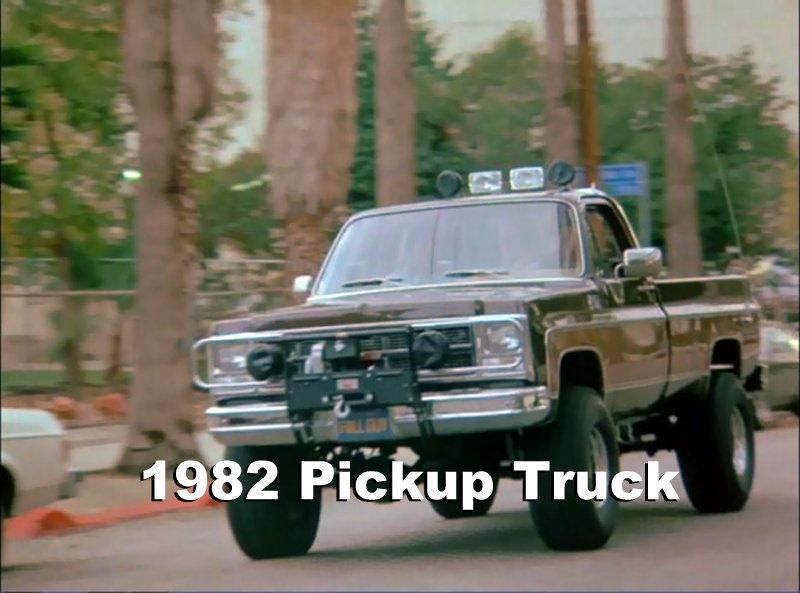
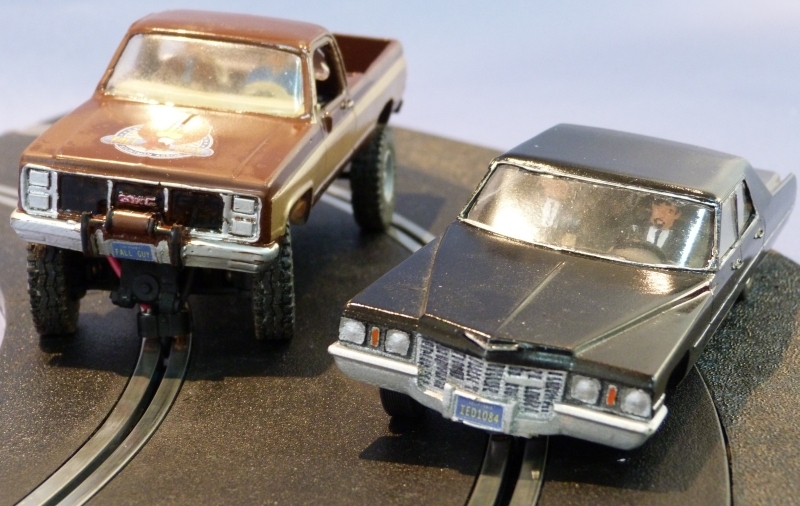
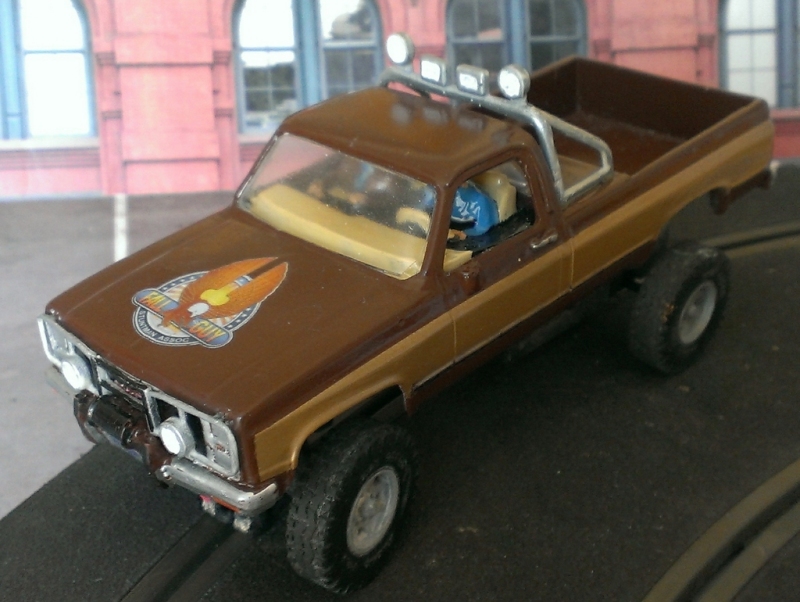
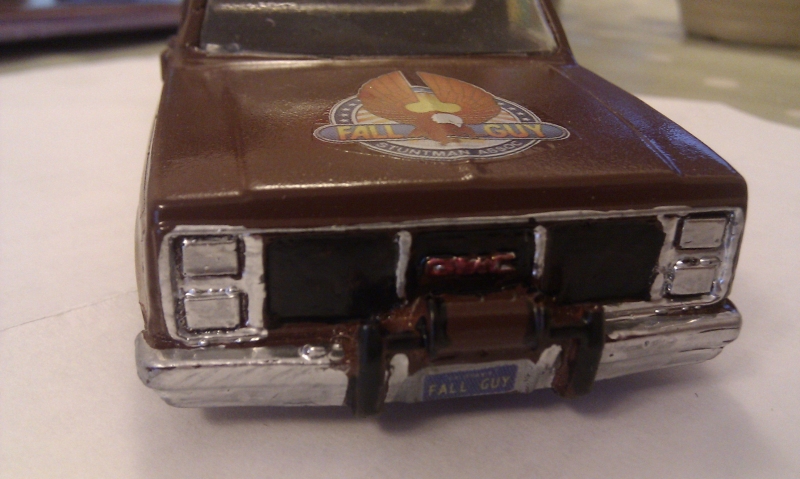
Imagine you’re a Hollywood stuntman, you need a vehicle to get around with one or two of your colleagues (and pause here to think how beautiful one of your colleagues might be) but to make ends meet you’re also a bounty hunter so you need a vehicle that can go anywhere to avoid the bad guys. Your vehicle of choice will be a fantastic pickup truck painted brown and gold and the only place to get the correct one is at chase-cars.com.
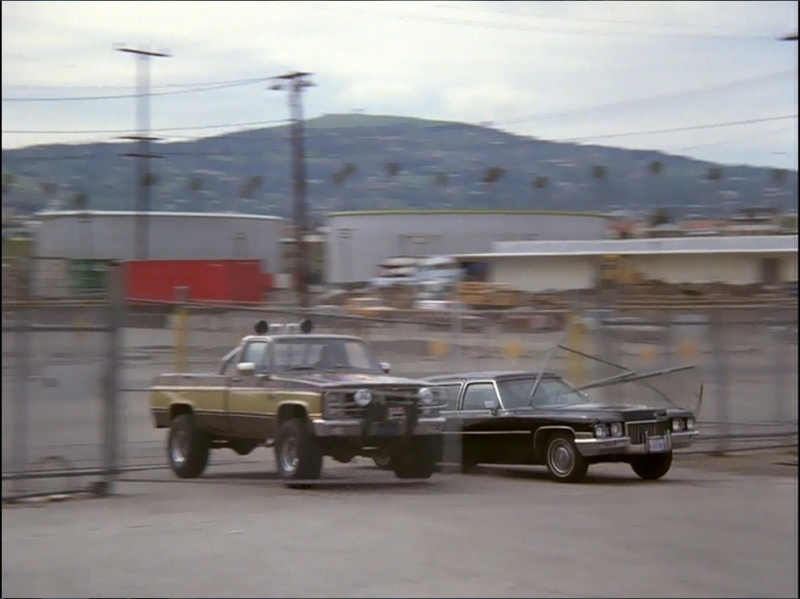
Ideal for chasing bad guys in their black limo!
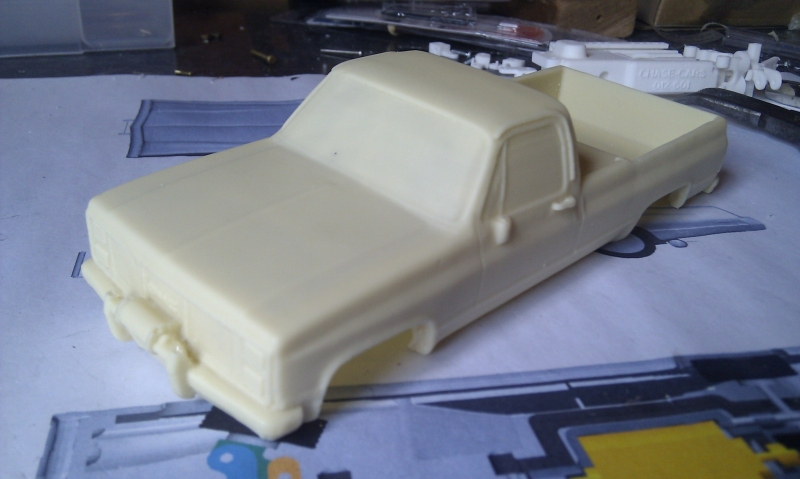
The 1:32 resin bodyshell is cast from a 2 part mould with body mounts already fitted, and the windows are much thinner and easier to cut out than with my older bodyshells.
Because the track is so wide, you need much stronger springs so don’t forget to mention this if you order a chassis. It also needs a much wider front axle moulding, new hubs and a wider rear axle.
In the kit you get
- Resin bodyshell
- Vacform windows
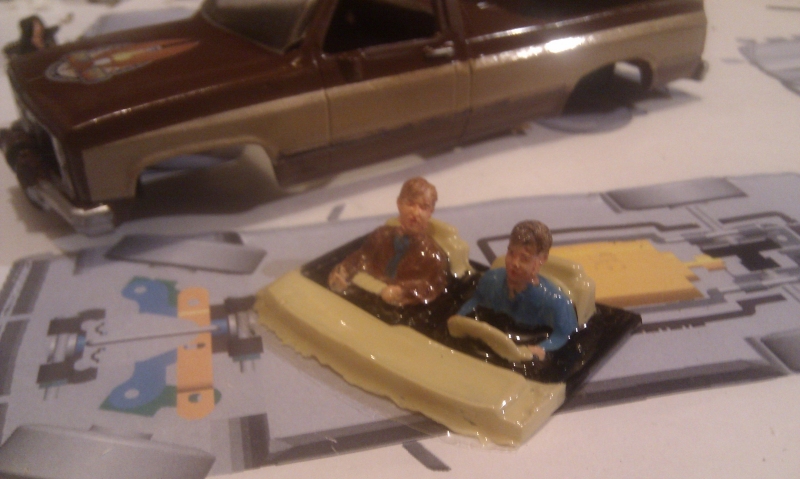
- Vacform interior
- Resin driver and passenger’s heads
- Waterslide graphics set
Bodyshell preparation is here, detail follows below.
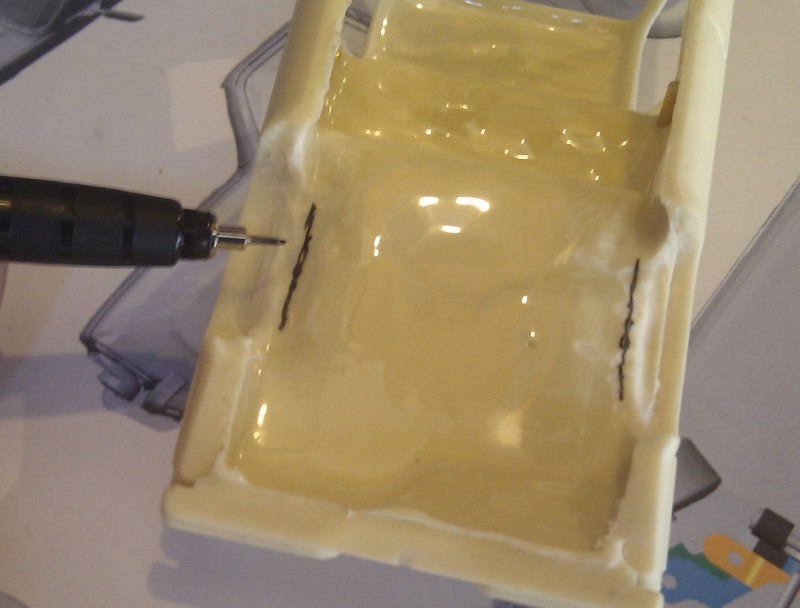
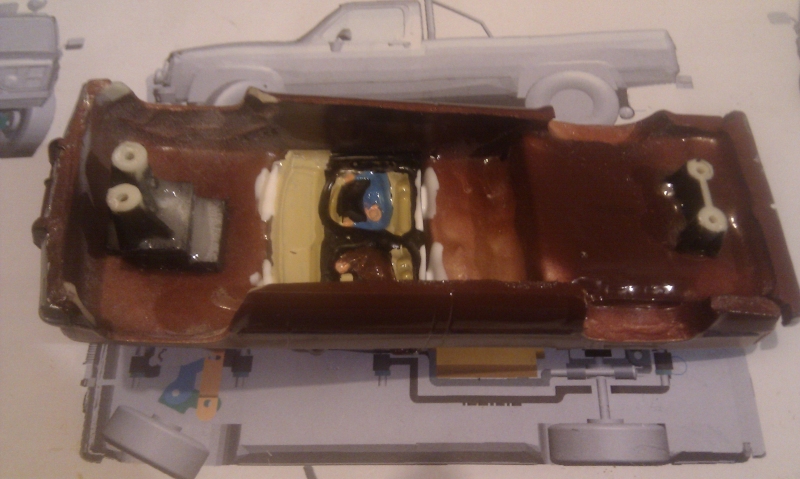
Your first step is to clear out the wheelarches so the outside shape of the body is correct. Resin dust is harmful to breathe in, so do this in a well ventilated area and wear a breathing mask.
Trial fit the windows to check for size. Don’t get the front pillars too narrow, and remember it’s easier to remove material than add it!
Now is the time to trial fit the windows; cut them individually from the vac-form sheet and trim the window or the bodyshell so they fit nicely.
Here are the windows cut out from the Pickup.
![]()
![]()
You also need to clear the resin around the rear wheelarches, mark where the tyres get close and get in with the Dremel again.
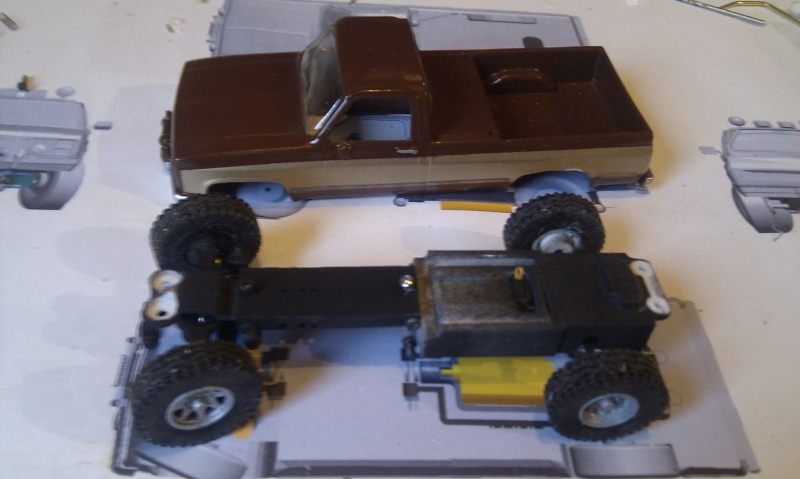
Check for clearance on the chassis, those big tyres need a lot of space around the wheelarches when they steer. It’s worth painting the chassis matt black as it’s quite visible under the bodyshell.
The decals have already been coated with one thin coat of a water based acrylic to help protect them whilst they are applied, however they are very thin and can tear easily. The clear film is continuous and so each decal must be cut carefully from the sheet. Cut with a sharp scissors, craft knife or scalpel but leave a small clear margin around each decal. This will help to prevent any potential solvent ingress when the decals are coated with clear lacquer and will reduce the chance of any ink flaking off.
The decals should be dipped into warm water for 2-5 seconds and should not be allowed to float off the backing paper in the water. Shake off any loose water, then within 30 seconds, slide into position on the model.
Once the decals are completely dry, apply some clear lacquer to the whole bodyshell to seal the decals and protect the paint.
Next, paint the interior
Now you can fit the windows. Always use glue suitable for windows – sometimes it’s called Canopy glue but as long as it doesn’t bloom it should be ok.
Then fit the interior. I use the same Canopy glue to make sure it doesn’t make the windows bloom.
Now you’re ready to go! Go and set up an unfeasibly well positioned ramp and get after the bad guys